

Having a fast-loading website is critical if you intend to do business on the Internet. Not only is a fast-loading site more likely to convert visitors into customers, it will rank higher in search engines because website speed is often used as a ranking factor.
There are various optimisations you can perform to your WordPress blog to make it run faster, including limiting image sizes and upgrading your web host. However, one of the most effective optimisations available is installing a caching plugin like the W3 Total Cache Plugin.
This Beginner’s Guide To W3 Total Cache Plugin will explain the benefits of caching before guiding you through the process of setting up W3 Total Cache Plugin on your website. Let’s get started!
Table of Contents
- What is Web Caching?
- What Are The Benefits Of Web Caching?
- What Does W3 Total Cache Do?
- Installing W3 Total Cache Plugin
- Configuring W3 Total Cache Plugin
What Is Web Caching?
When a web application receives a request for a web page, it has to gather all of the elements required to show that page. That may involve a call to a database and the collection of various assets including images, javascript files, and CSS files. Every time another user requests that page, it will request all of those elements again — which can be a very slow and labour intensive process for your web server.
When web caching is used, the web application or web server stores a complete version of the web page which is ready to send to other users. This version will usually be compressed and is of much smaller size than the original, which further improves the speed of the transaction. This form of caching is referred to a server-side caching. There are many forms of server-side caching, which store files, database calls, or objects on a disk or in the server’s RAM.
Caching can also take place on the user’s computer, with web browsers storing elements of the web pages they have visited. This is referred to as client-side caching.
What Are The Benefits Of Using A Caching Plugin?
There are many benefits to installing a WordPress caching plugin. Here are just a few!
- Your users will enjoy a faster and more responsive website
Users prefer websites that are fast and easy-to-use. They are more likely to remain on a website that is responsive and more likely to make a purchase. - Your search engine rankings will improve
Major search engines use speed as a factor when determining where a website should rank. - Bandwidth savings
Your website will use fewer data each month, which can save you money on web hosting costs. - Your website will be able to handle more traffic
Because you are loading fewer resources when a user visits a page, your web server will be able to handle more concurrent users. Caching is an excellent tactic for handling sudden bursts of traffic.
What Does W3 Total Cache Do?
W3 Total Cache is an extremely powerful application with dozens of features. The main features of the plugin are:
- Caching
It can create caches of web resources to speed up load loading times and reduce server load. - Optimising files and reducing their size
W3 Total Cache can combine and compress HTML, Javascript, and CSS files, which greatly reduces their size. - Integrating content delivery networks (CDNs)
CDNs are third party companies who store some of your website’s data for you. W3 Total Cache makes it easy to integrate data stored on a CDN network.
Installing W3 Total Cache Plugin
W3 Total Cache Plugin is quite simple to install! Follow the steps below.
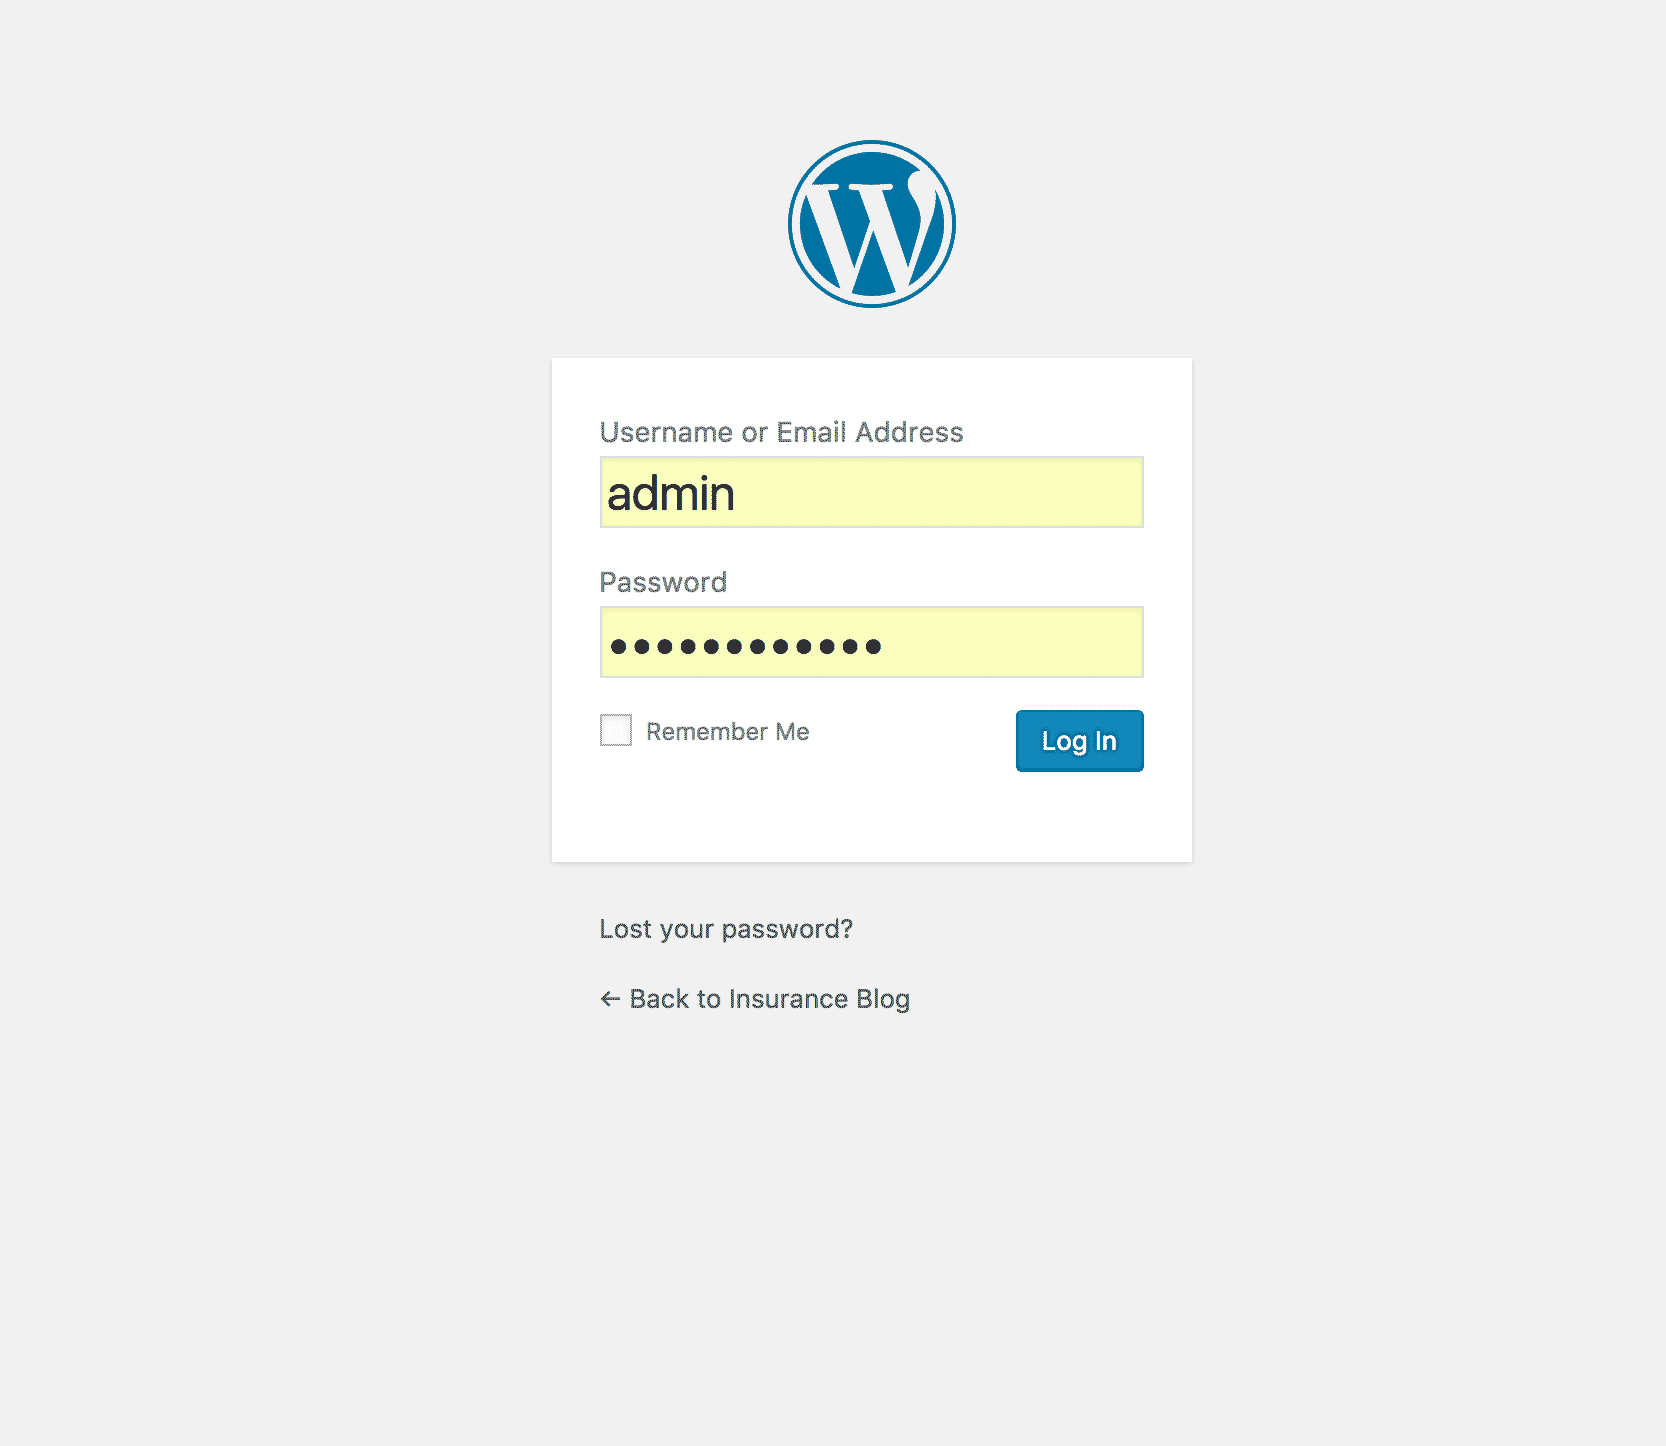
1. Log into the administration section of your WordPress website
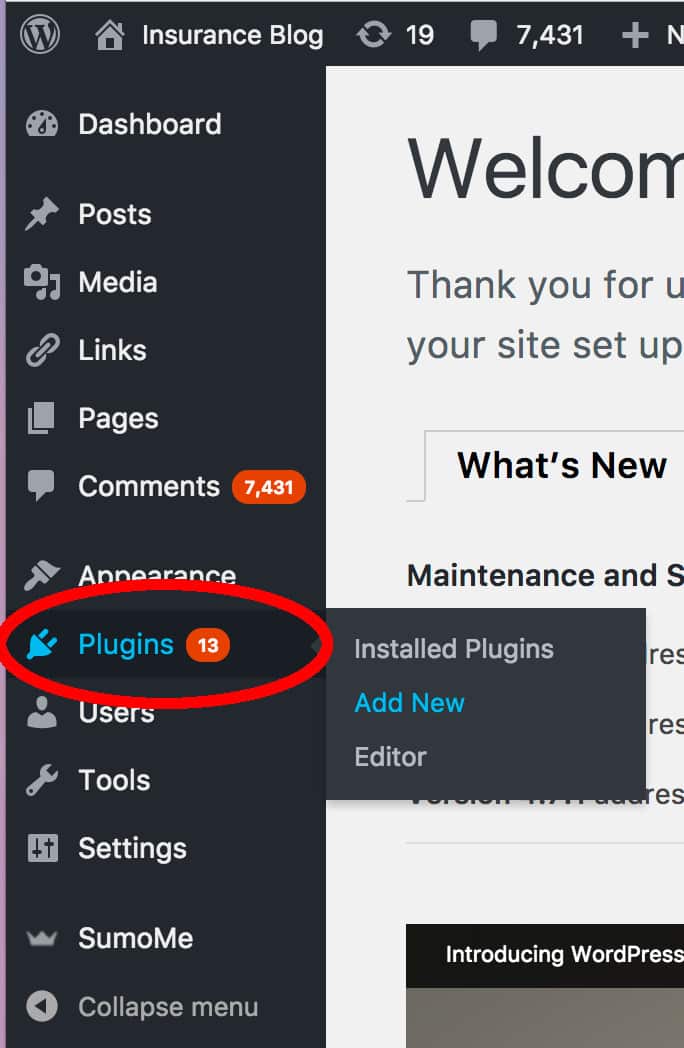
2. Hover over the “Plugins” menu item on the left-hand side and click “Add new”
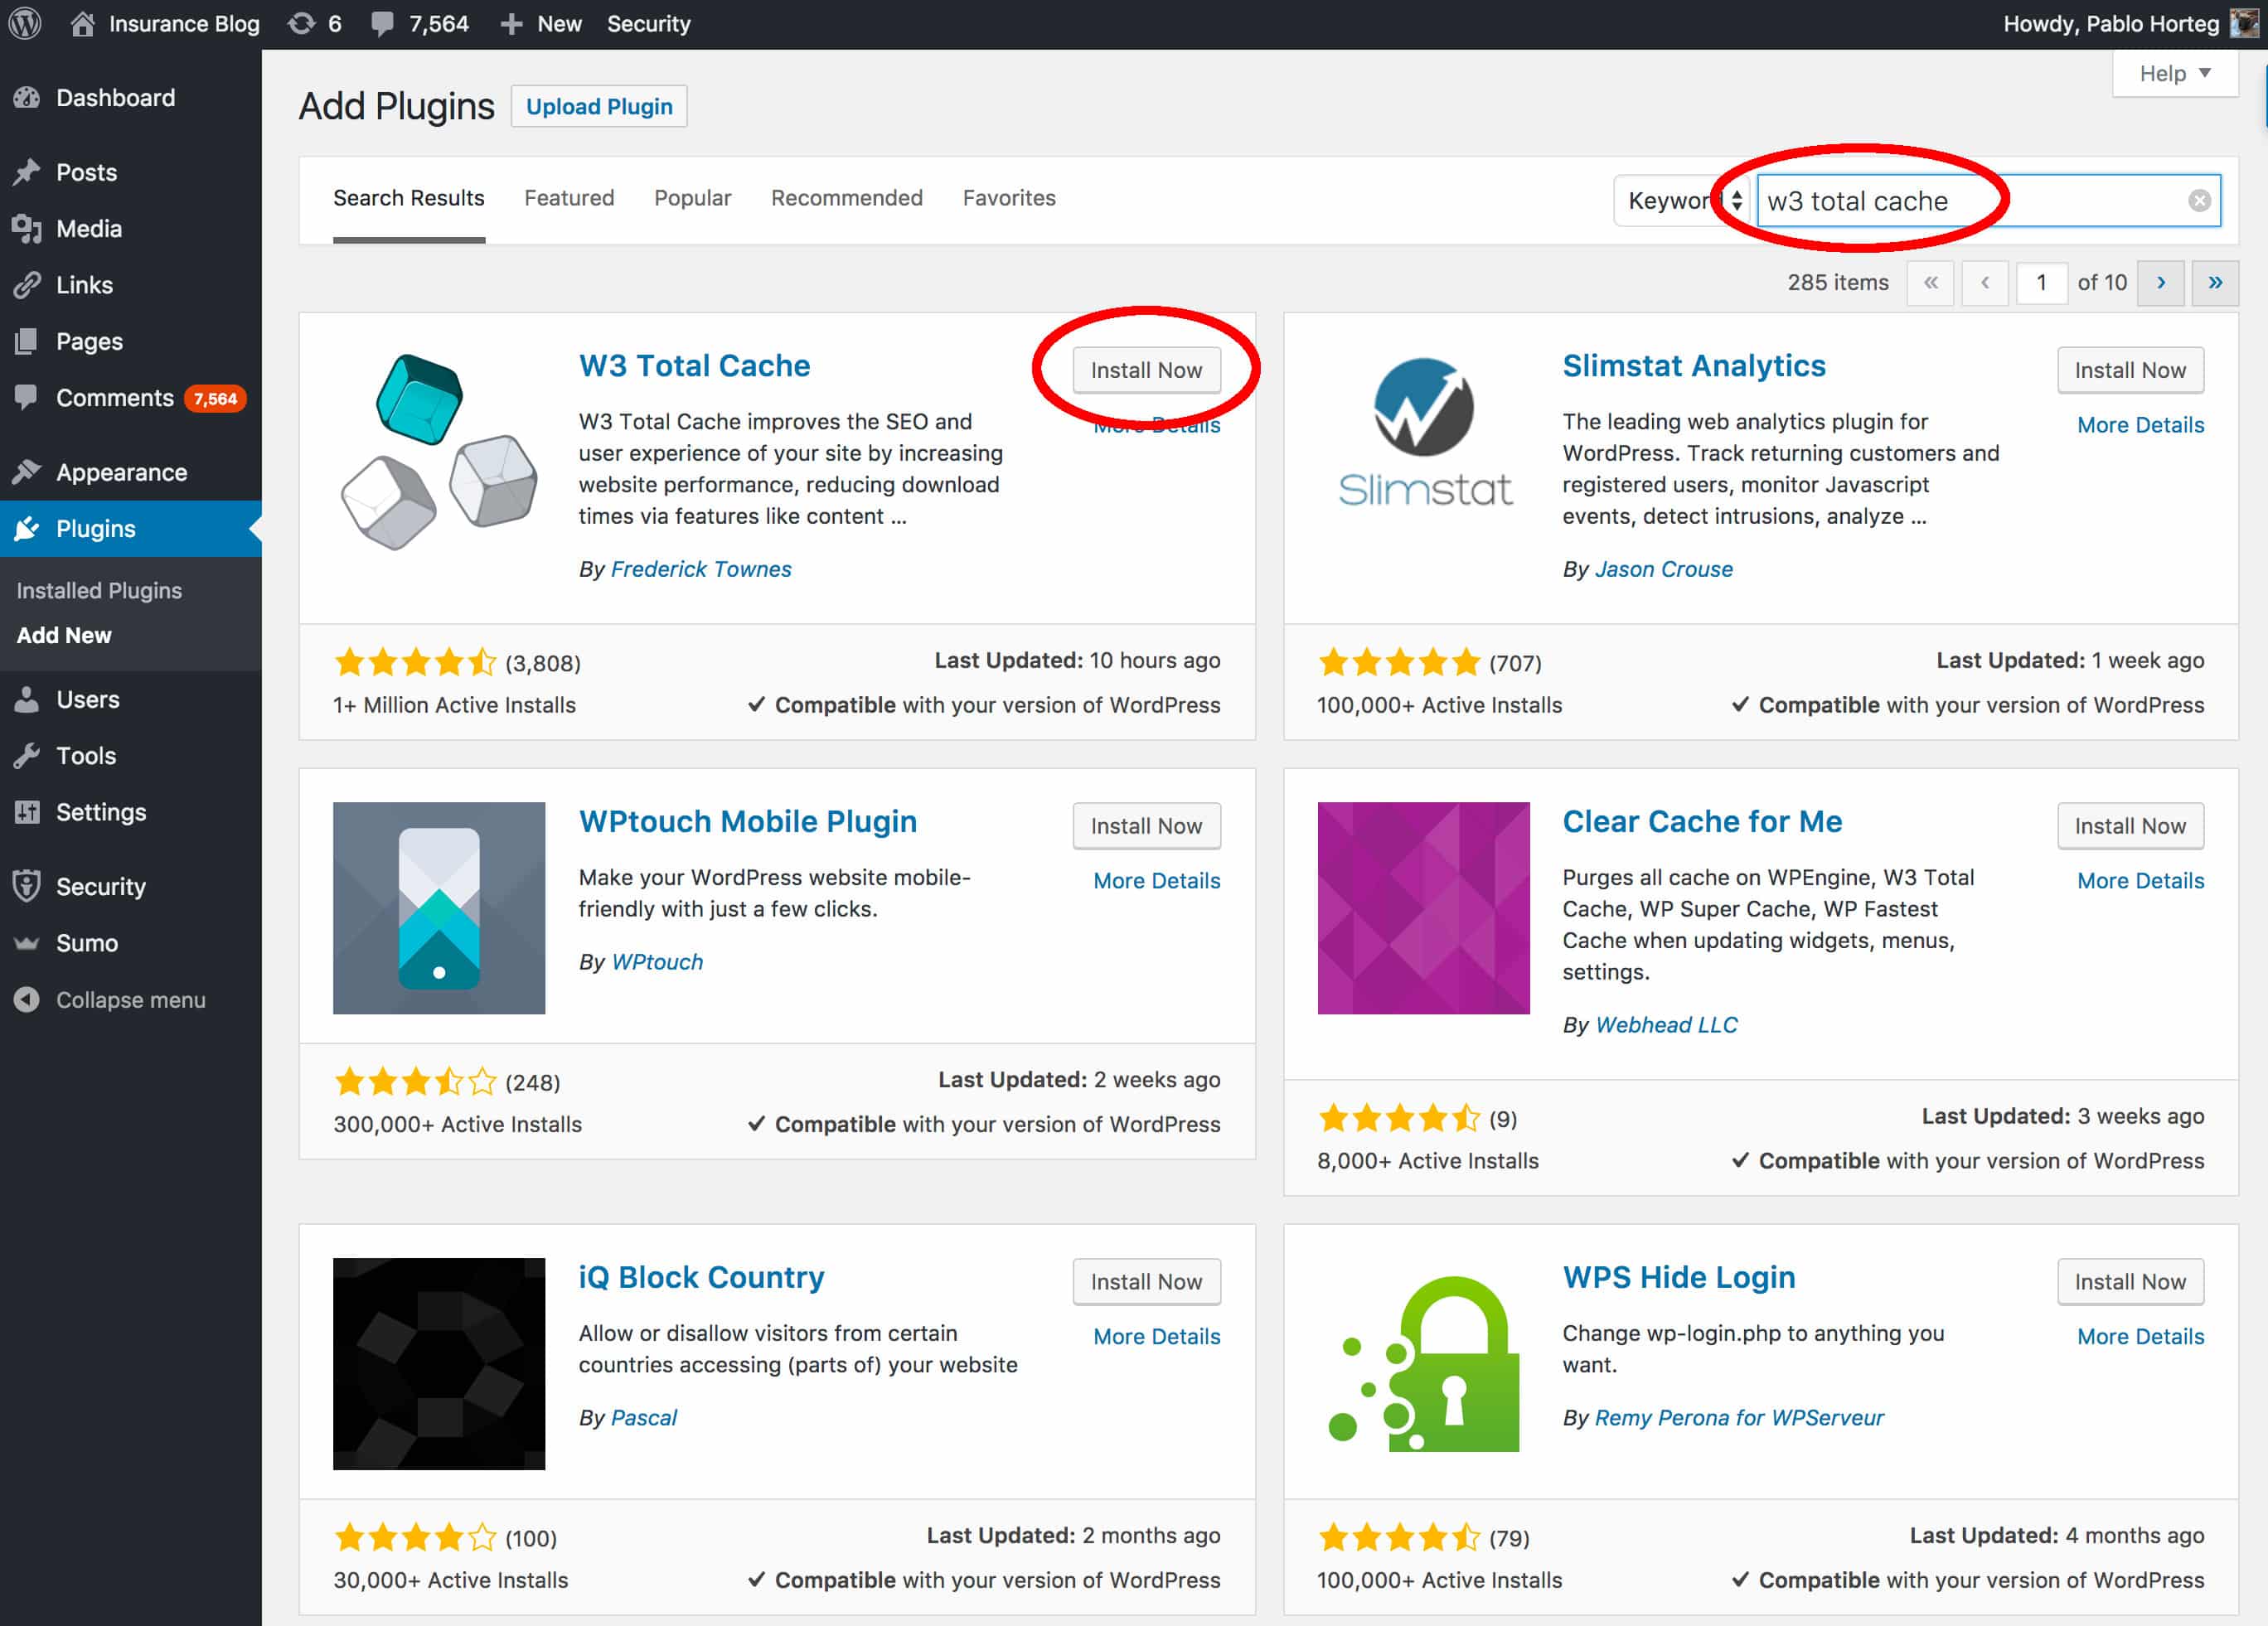
3. Search for the W3 Total Cache Plugin by typing “W3 Total Cache” in the right-hand search box. In a couple of seconds, the search results will appear. When they do click “Install Now”.
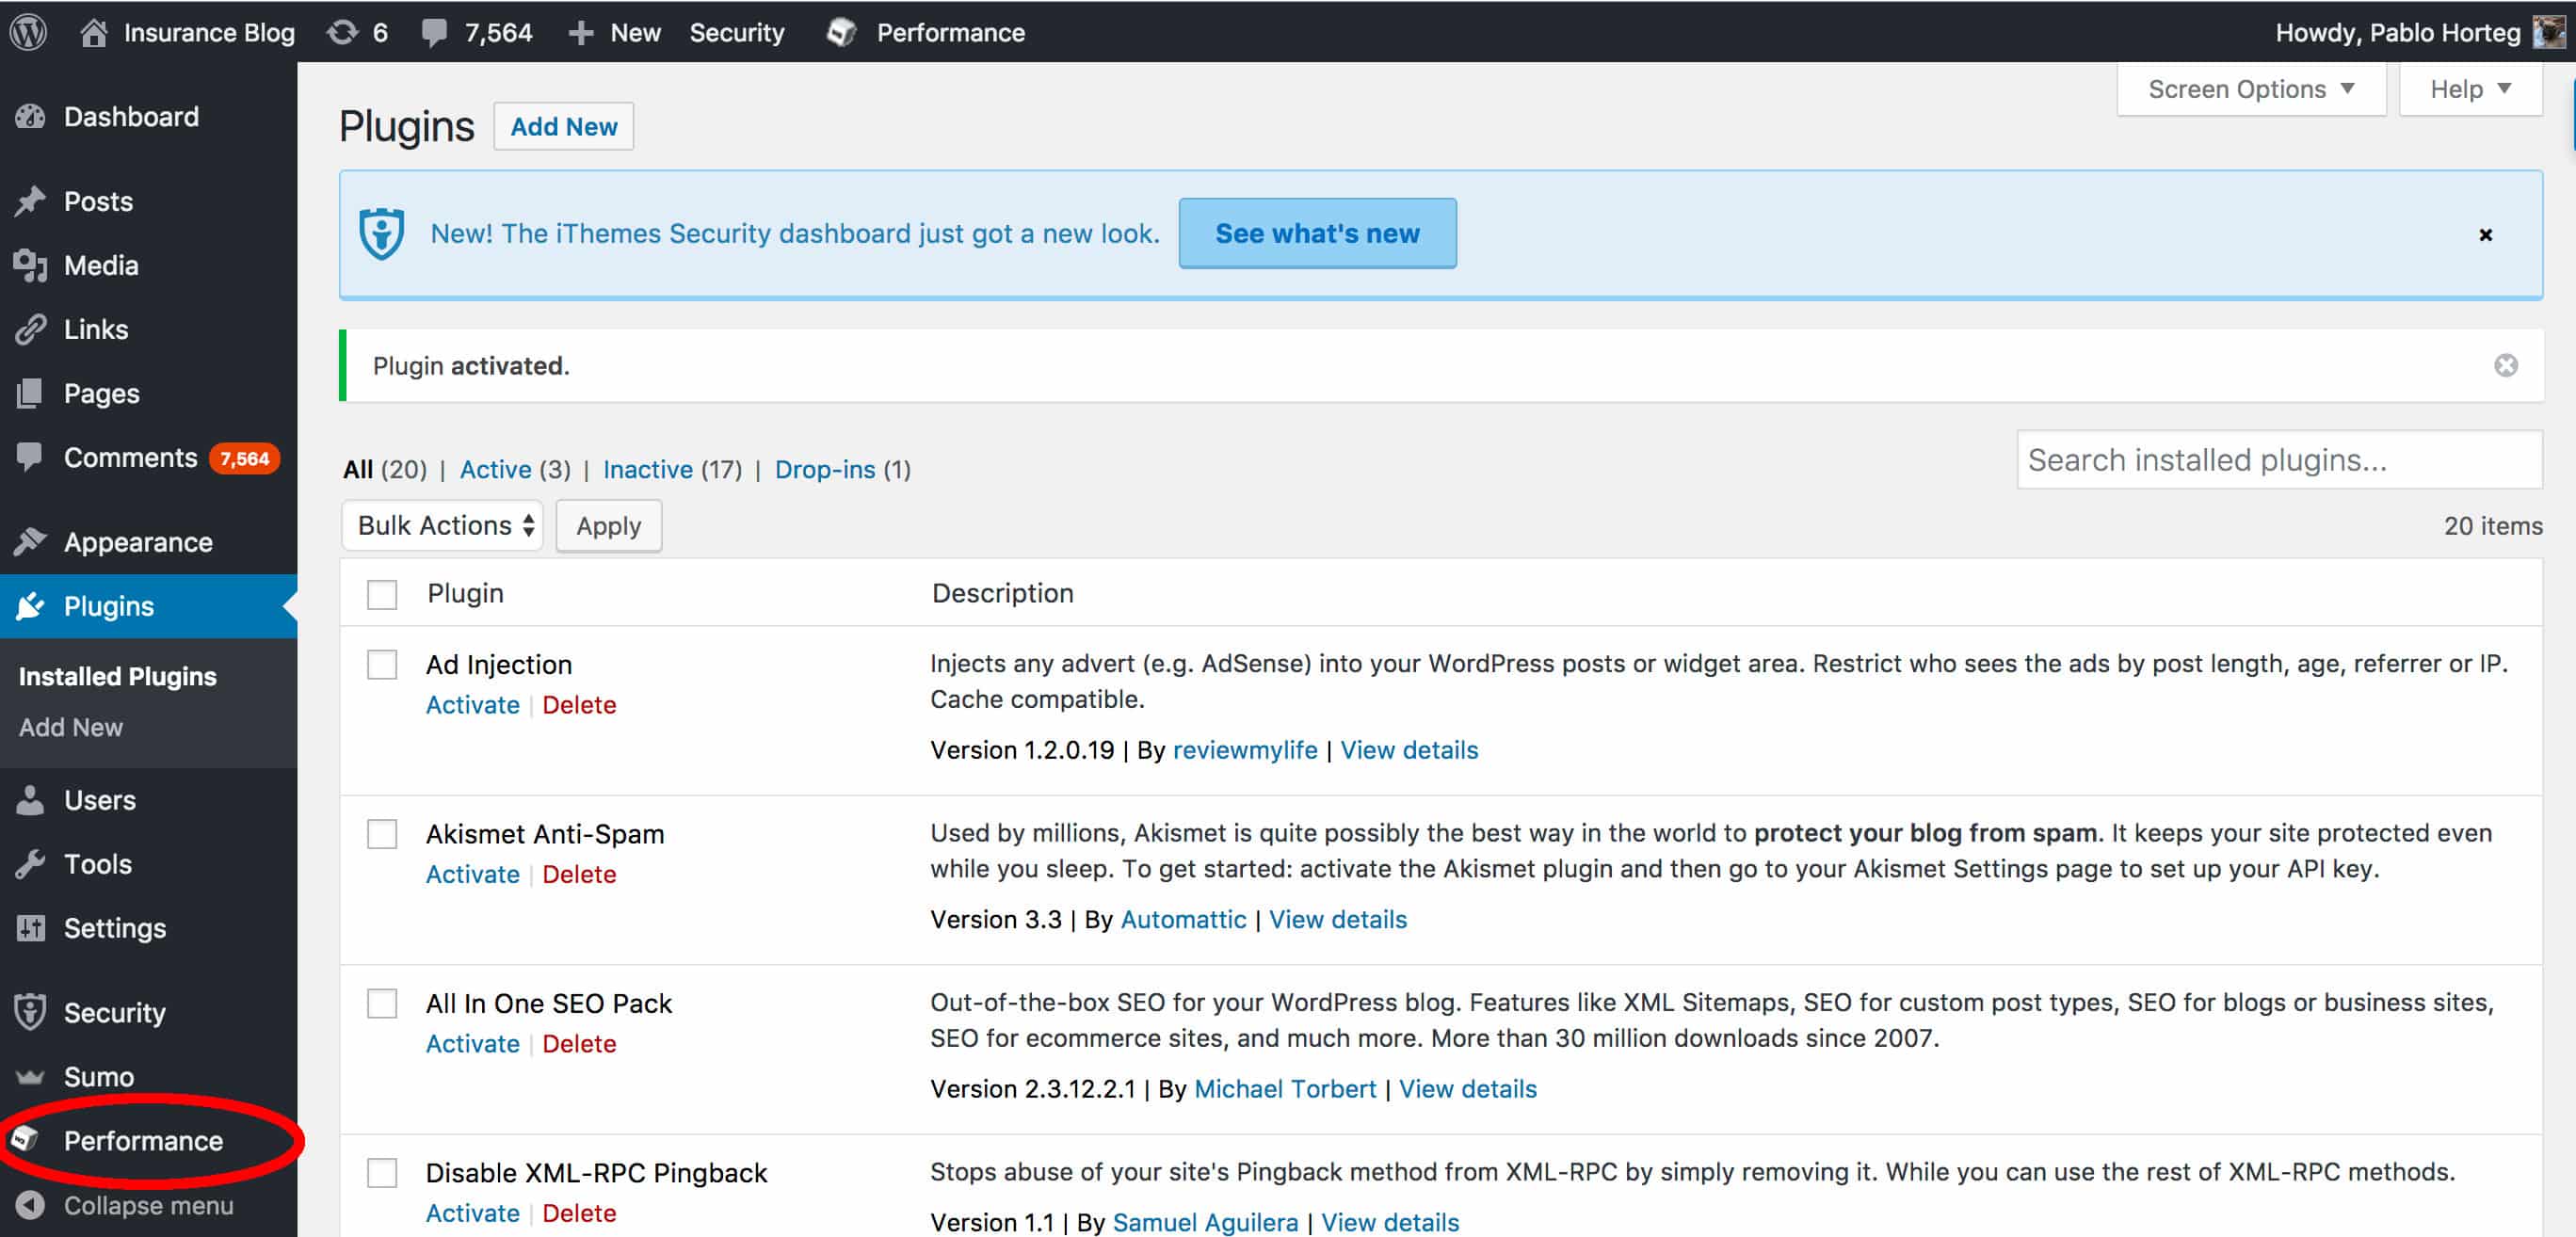
4. Once it is installed, click on the activate button

5. You will now see a new menu item on the left-hand menu entitled “Performance”. Click on this menu item to start configuring the plugin!
Configuring W3 Total Cache Plugin
The W3 Total Cache Plugin has a LOT of menu items! But don’t be too daunted, once you understand the basic functionality of the plugin, it will make perfect sense. The menu items include:
- Dashboard
- General Settings
- Page Cache
- Minify
- Database Cache
- Object Cache
- Browser Cache
- User Agent Groups
- Referrer Groups
- CDN
- Monitoring
- Extensions
- FAQ
- Support
- Install
- About
Dashboard

This is where you first land after click on the “Performance” menu item. The most important features on this page are displayed near the top of the screen.

- Performing a compatibility check (Run this immediately)
This checks if your WordPress installation is fully compatible with the plugin. Running this check is one of the things you should immediately do after installation. You may have to make changes to file permissions or your server to fully accommodate W3TC. - Clearing different caches
Sometimes you might need to clear the plugin’s caches to immediately view changes you have made to the website. You can either clear all caches or selectively clear the Opcode cache (PHP script caching), Memcache cache (ram caching) or Disk cache (storing complete files on the hard disk). - Update media query string
W3 Total Cache adds strings to the names of some files to make updating individual files easier. After you have made changes to CSS, Javascript or image files on your site, you can update the string added to the file names and force web browsers to use the updated files.
The dashboard also gives you some caching statistics and the ability to add a Google page speed report box. Apart from that, it provides some information about premium services and has configuration boxes for third party services like MaxCDN/Swarmify (optional).
General Settings

The general settings page is the most important configuration section of the plugin. This is where you can enable and disable various modules and change how they cache or minify your website. Most users rarely venture outside of this section, because most of the basic functionality of the plugin can be controlled here. The other menu items contain more advanced features that allow you to fine-tune the caching setup. The options in General Settings include:
General Settings: General
Toggle all caches off or on at once. It also contains a preview mode that you can use to test your configuration. You should use the preview mode after you have configured the other cache settings to test everything is working. Once enabled, you will have three options: Disable (turn preview mode off), Deploy (the site is working with the cache settings so you want to make it live) and Preview (launches a new browser window to test the cache settings)
General Settings: Page cache
Page cache is the caching of full pages with all of their assets (database records, CSS, JS and other files). You can specify which type of caching you want to use for page caching, using the hard disk, RAM or an Opcode cache. This is the most important feature of W3TC and quickly delivers a substantial improvement on performance.
General Settings: Minify
Minification reduces the size of your files by removing unnecessary data and white space. You can turn minification on or off, change the storage method and change the tools that are used to compress files.
General Settings: Opcode cache
This is where you enable or disable PHP Opcode caches.
General Settings: Database cache
Database calls can be time-consuming and use a lot of resources on your server. In some cases, multiple pages are unnecessarily repeating the same query over and over to the database. To reduce the number of calls you make, you can cache these database queries to your server’s disk or random access memory.
General Settings: Object cache
PHP applications like WordPress use “classes” to provide program logic and store data. Everything from the content of menus to the active users can be placed in a class. You can choose to store classes in a site-wide cache so the application can access them quickly without repopulating classes for each new user.
General Settings: Browser cache
There are client side caches available in browsers, which store various media files. You can tell W3TC to make the most of these caches.
General Settings: CDN
You can use a content delivery networks (CDN) to store some of your files. If you have purchased one, set it up here. W3TC will pull in the files that you have stored on your CDN servers.
General Settings: Reverse proxy
A reverse proxy can handle requests for pages before those requests even reach WordPress! An application called Varnish is used to handle these requests. You can add details of your Varnish servers here.
General Settings: Monitoring
This section allows you to set up New Relic monitoring of your website. It is a very useful tool for tracking the health of your site and any downtime it experiences.
General Settings: Fragment Cache
Fragment caching uses small fragments of pages and combines them with other resources to create a page. For example, it could cache the website’s menu and combine it with other resources to form a page. Use this section to enable/disable this cache.
General Settings: Licensing
Where you add license details after upgrading to the paid version of the plugin.
General Settings: Miscellaneous
You will find a variety of miscellaneous settings in this section. Most users can ignore these settings, but you should check that you have “verify rewrite rules” checked to test your W3TC’s modifications are working correctly.
General Settings: Debug
If you are experiencing problems with your installation, enable debugging information here.
General Settings: Import/Export settings
Your configuration of W3TC might become complex after a while! This feature allows you to import/export your cache settings and reset the plugin’s settings.
Page Cache
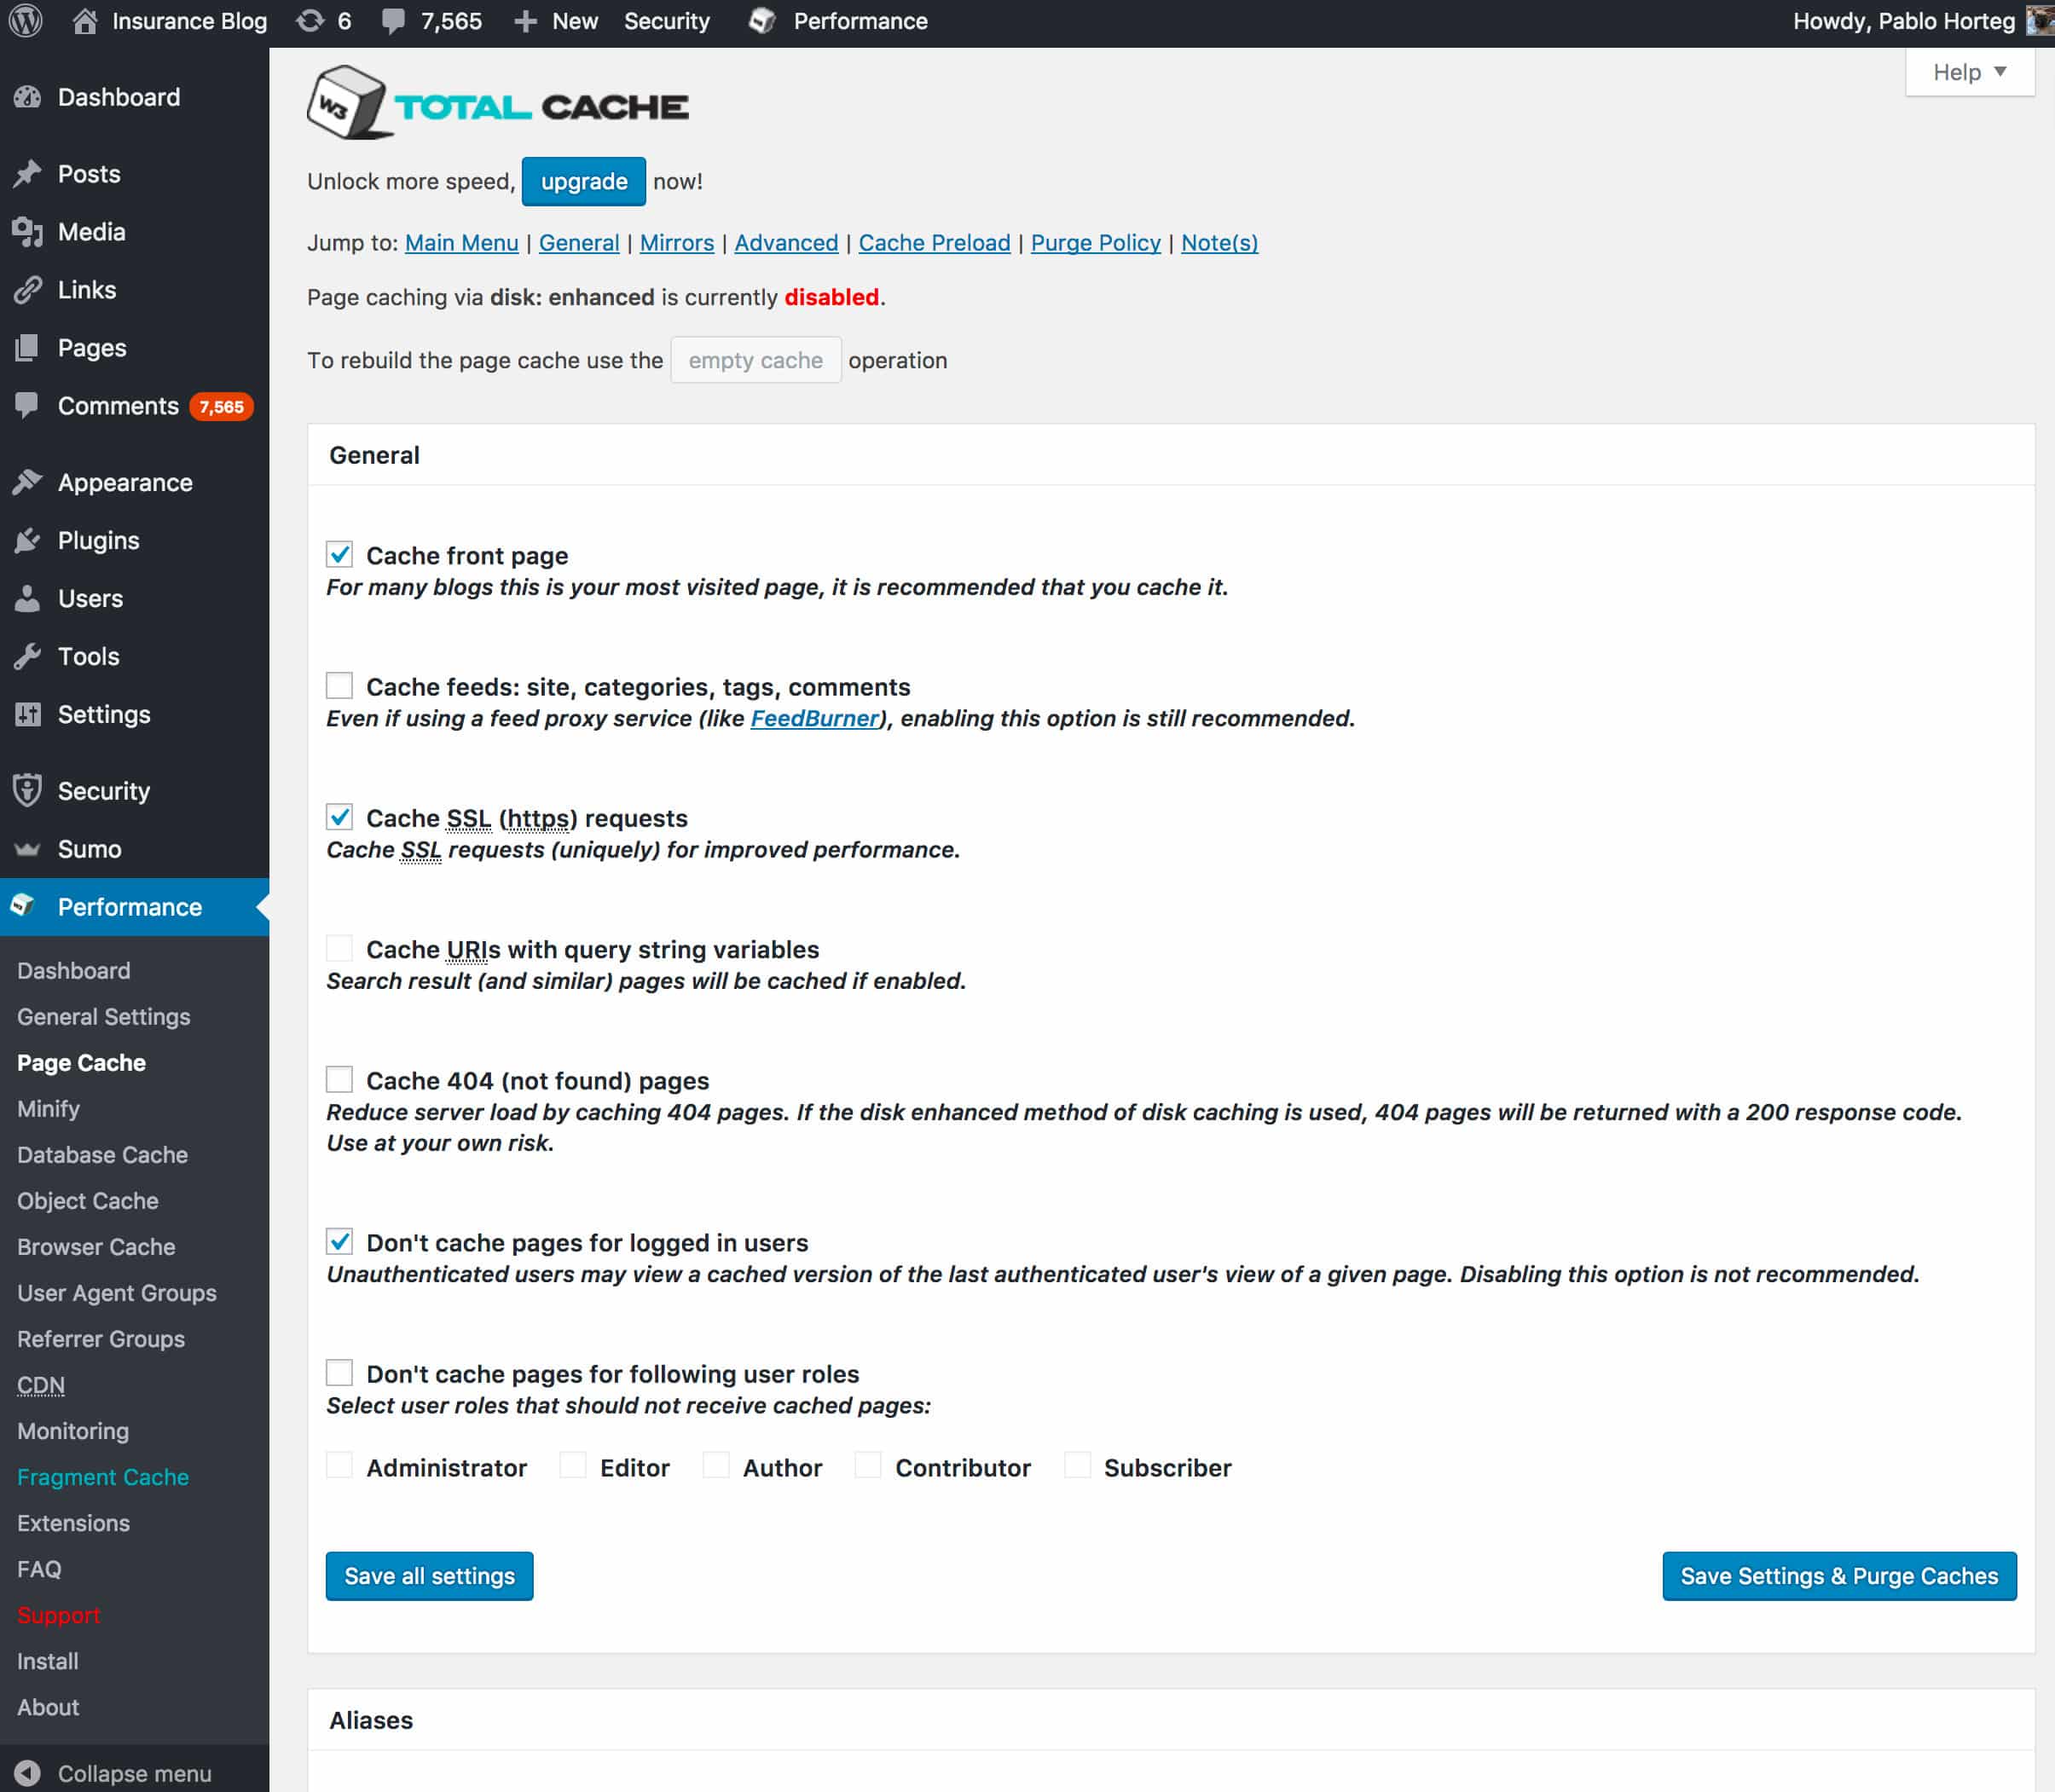
The remainder of the menu items contain advanced settings for specific types of caching or monitoring. The Page Cache section allows users to tweak many advanced settings relating to the page cache. The settings on offer include:
Page Cache: General
You can decide which pages and feeds you wish to cache or change settings for specific types of users here.
Page Cache: Aliases
If you host content on different aliases, you can add their names here to ensure the cache handles them correctly.
Page Cache: Cache Preload
You can direct the plugin to automatically build a cache, so it has pages prepared and waiting for user requests. The WordPress installation’s sitemap can be used to direct the plugin on which page to cache first.
Page Cache: Purge Policy
The cache should be purged when new content is added to the website, so users can see the updates. You can specific which pages to empty the caches for here.
Page Cache: Advanced
A range of advanced page caching settings are available here including how to handle HTTP requests and which pages should never be cached.
Minify
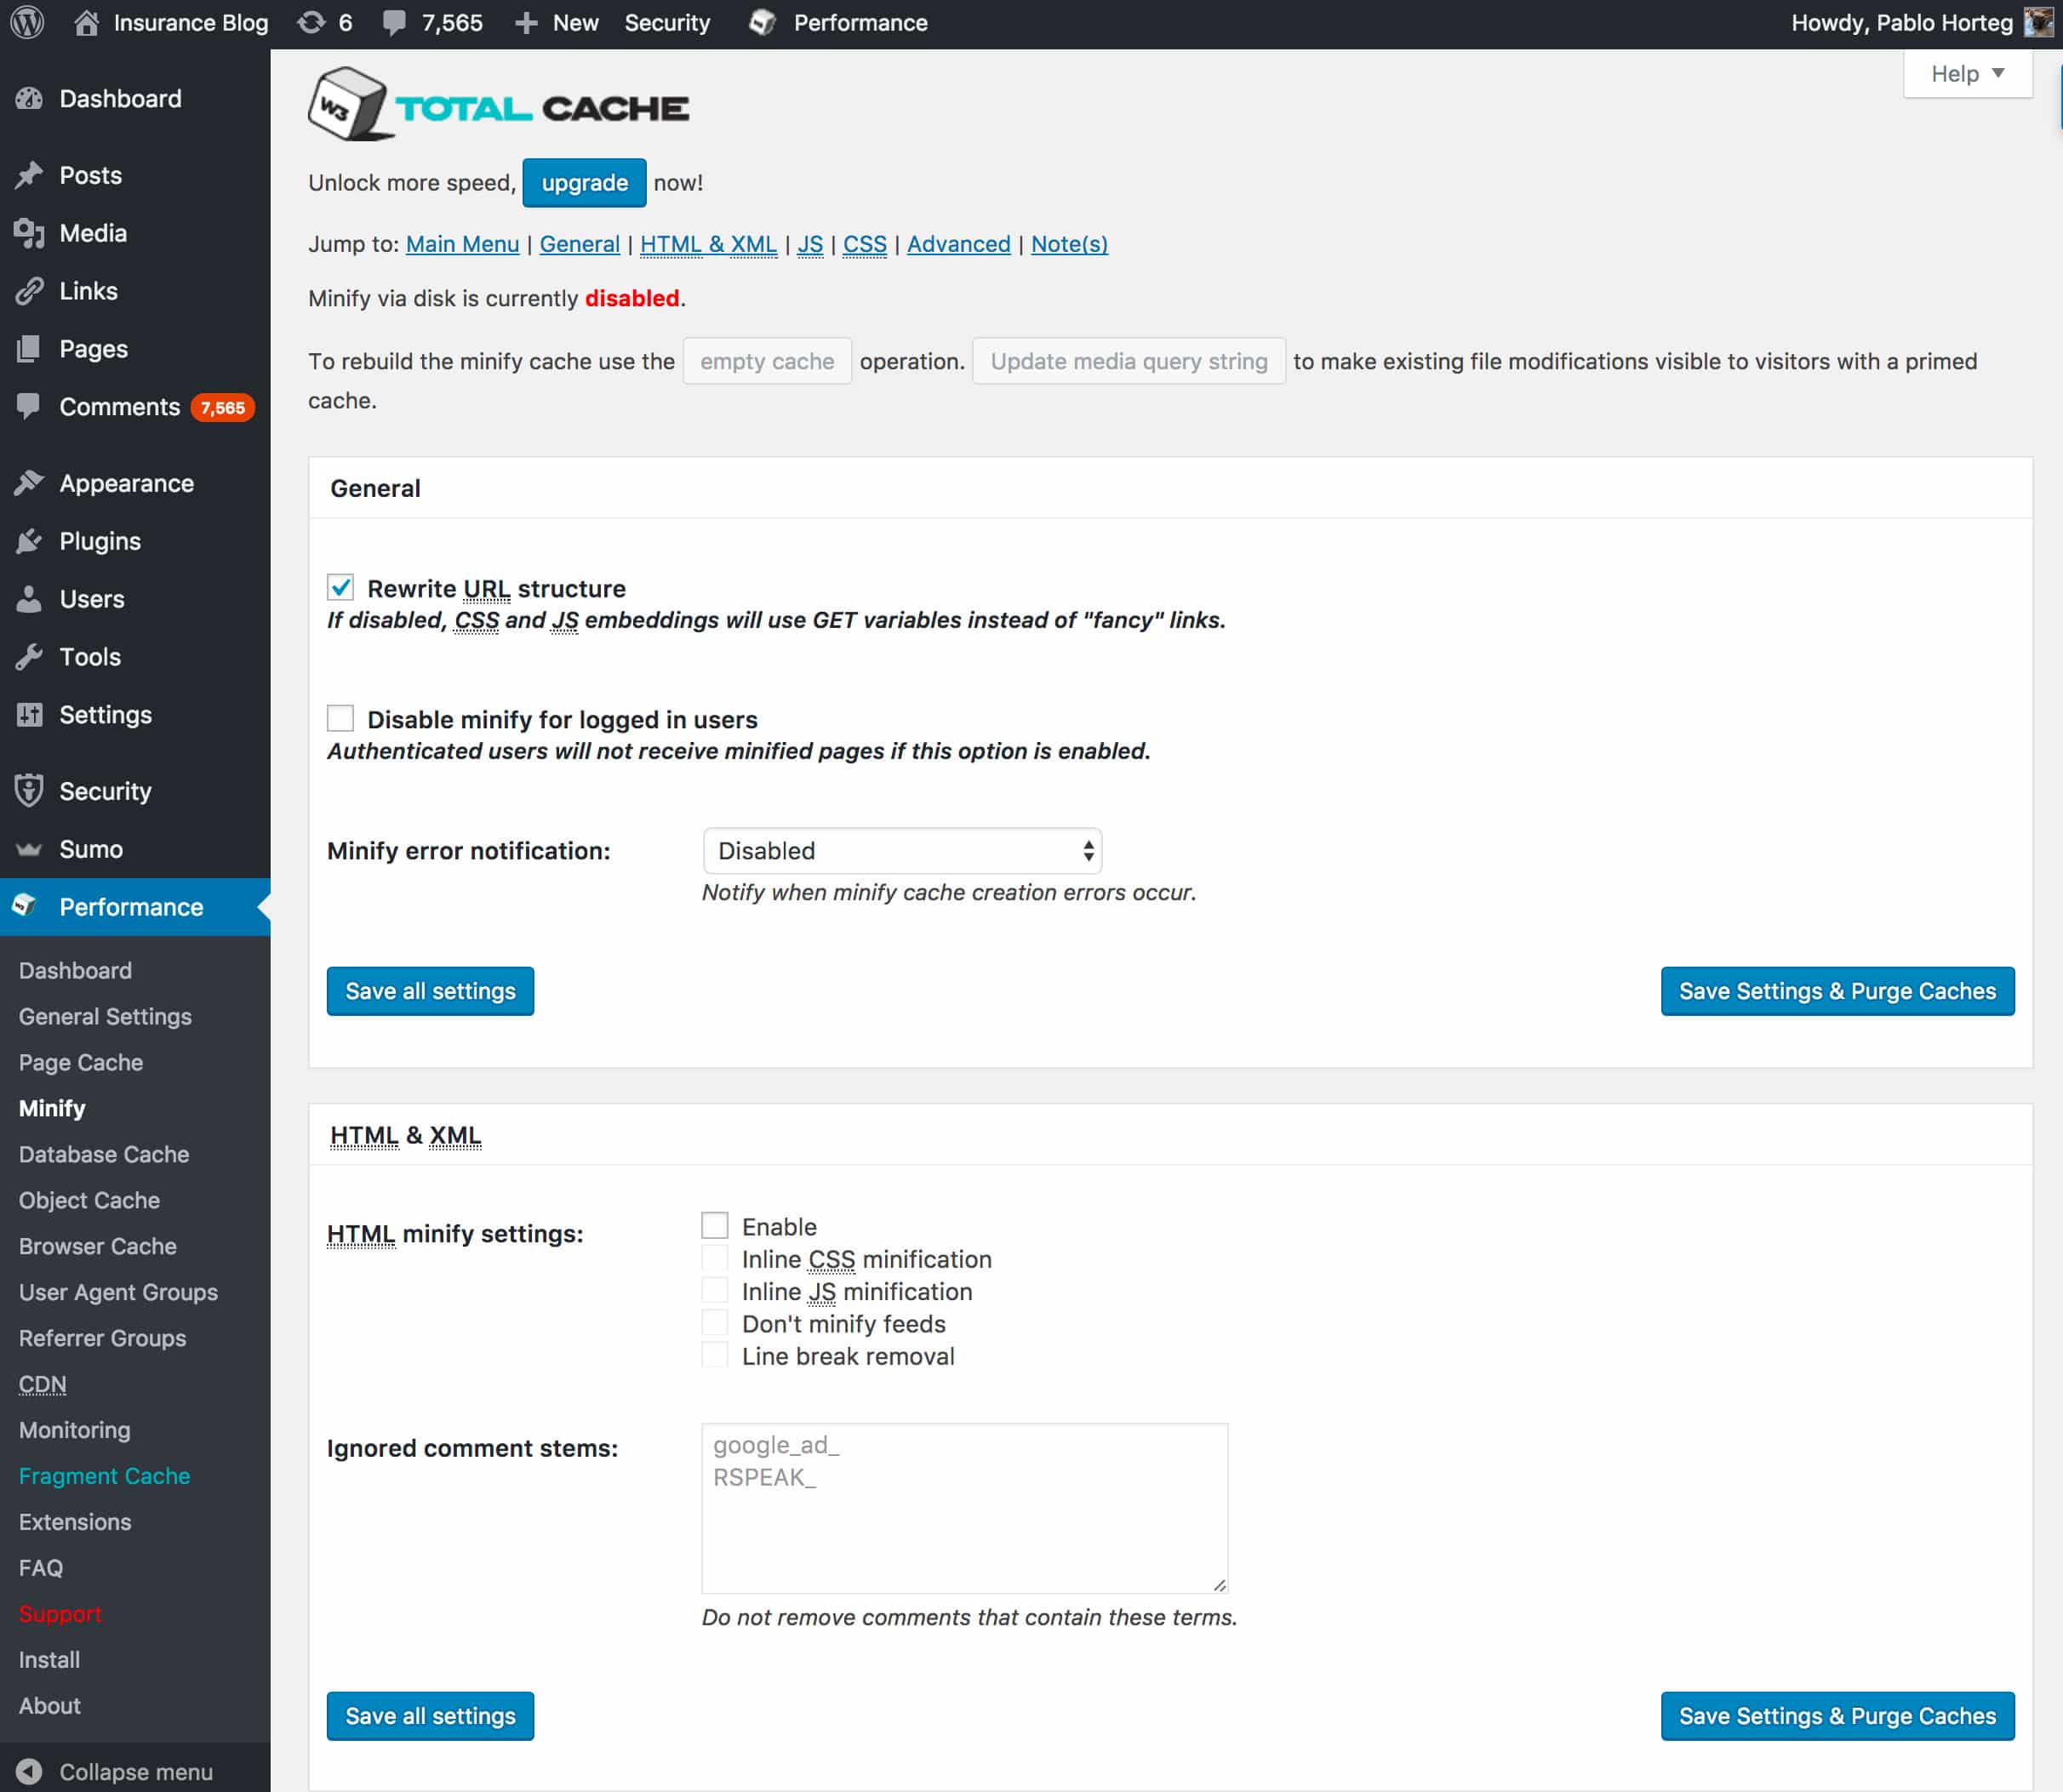
This section contains advanced settings relating to the minification of files.
Minify: General
This section allows you to enable or disable URL rewriting on minified files, disable minify for some users and send error notifications when minification fails in some way.
Minify: HTML & XML
This section allows you to specify which files should be minified and which types of comments should be ignored when minifying (important for some javascript files).
Minify: JS
This section contains some very specific rules for how minification should work when it comes to Javascript. These rules may need to be tweaked if you discover minification breaks some JS functionality.
Minify: CSS
You can change how CSS files are handled and specify the location of external CSS files here.
Minify: Advanced
Most users won’t have to alter these settings. They simply control how often external files are accessed and how frequently old cached items are removed.
Database Cache
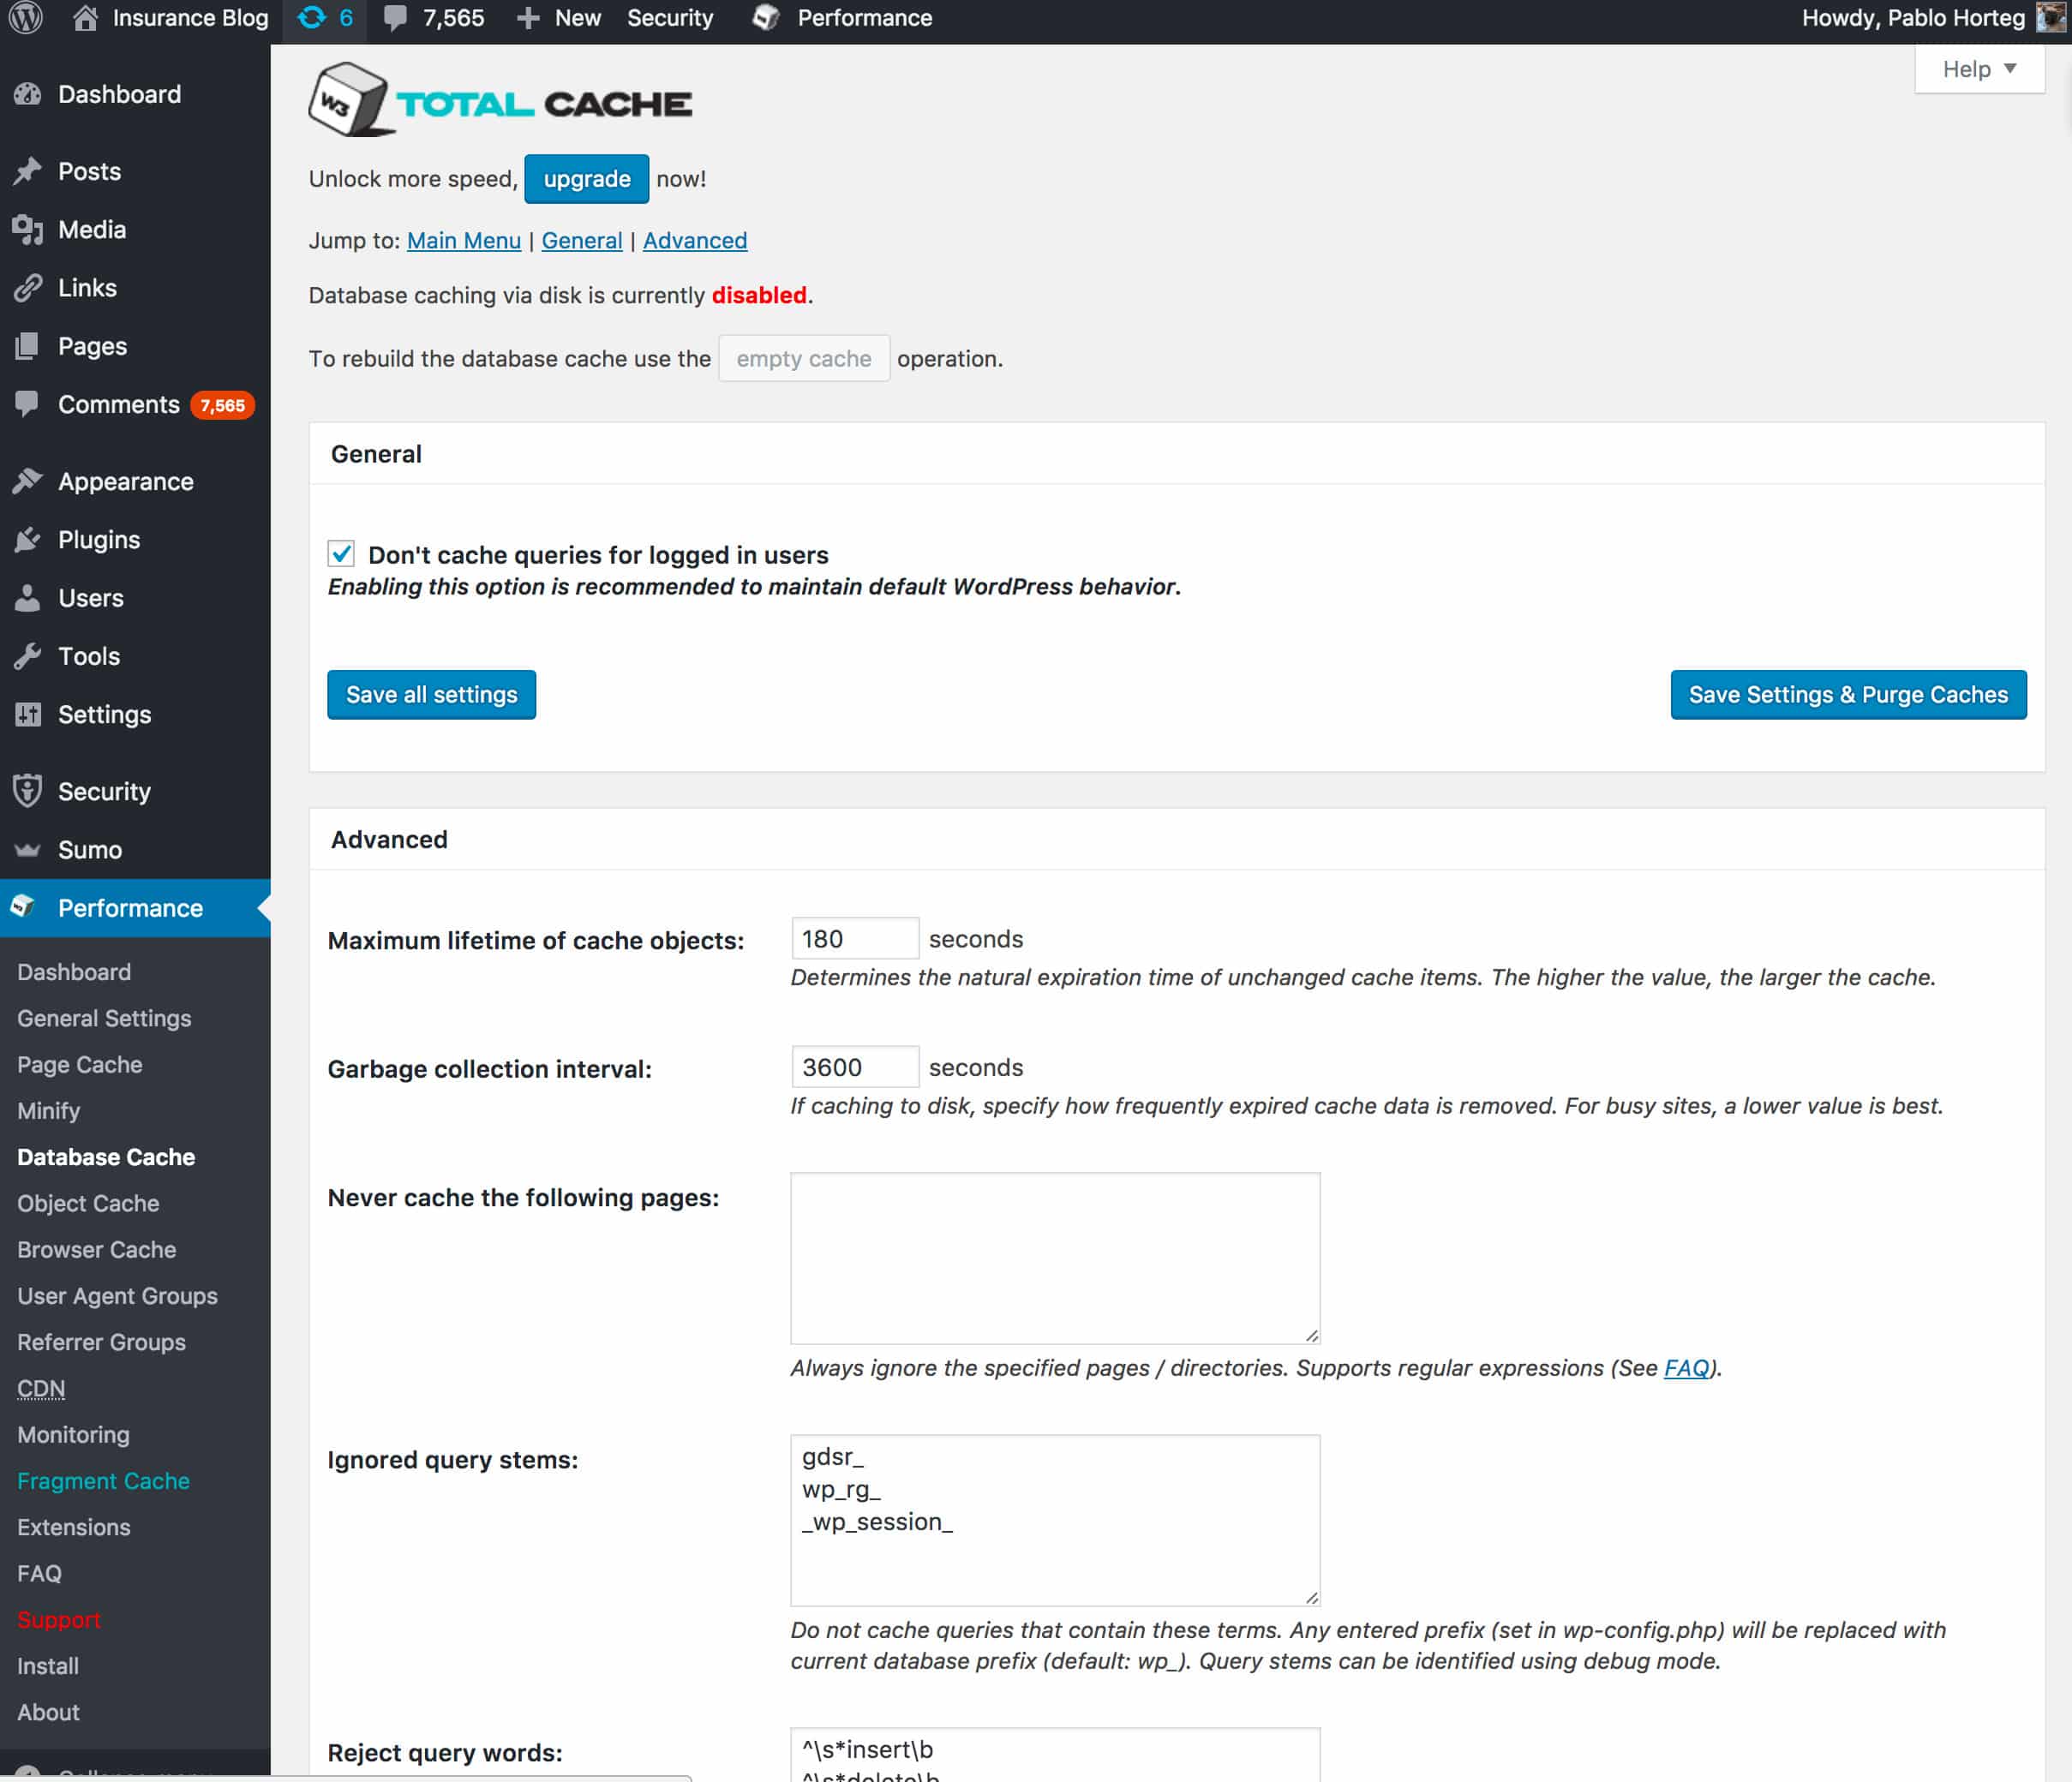
There are only two sections in the Database Cache configuration panel — General and Advanced.
Database Cache: General
It doesn’t get much simpler than this! There is just a single checkbox, which allows you to specify if you want to cache queries for logged in users. Most users will leave this as default (don’t cache queries for logged in users).
Database Cache: Advanced
These settings relate to how long database queries should be cached, how often should the cache be garbage collected and if there are any pages that should not be cached. You can also specify query words and query stems that should not be cached.
Object Cache
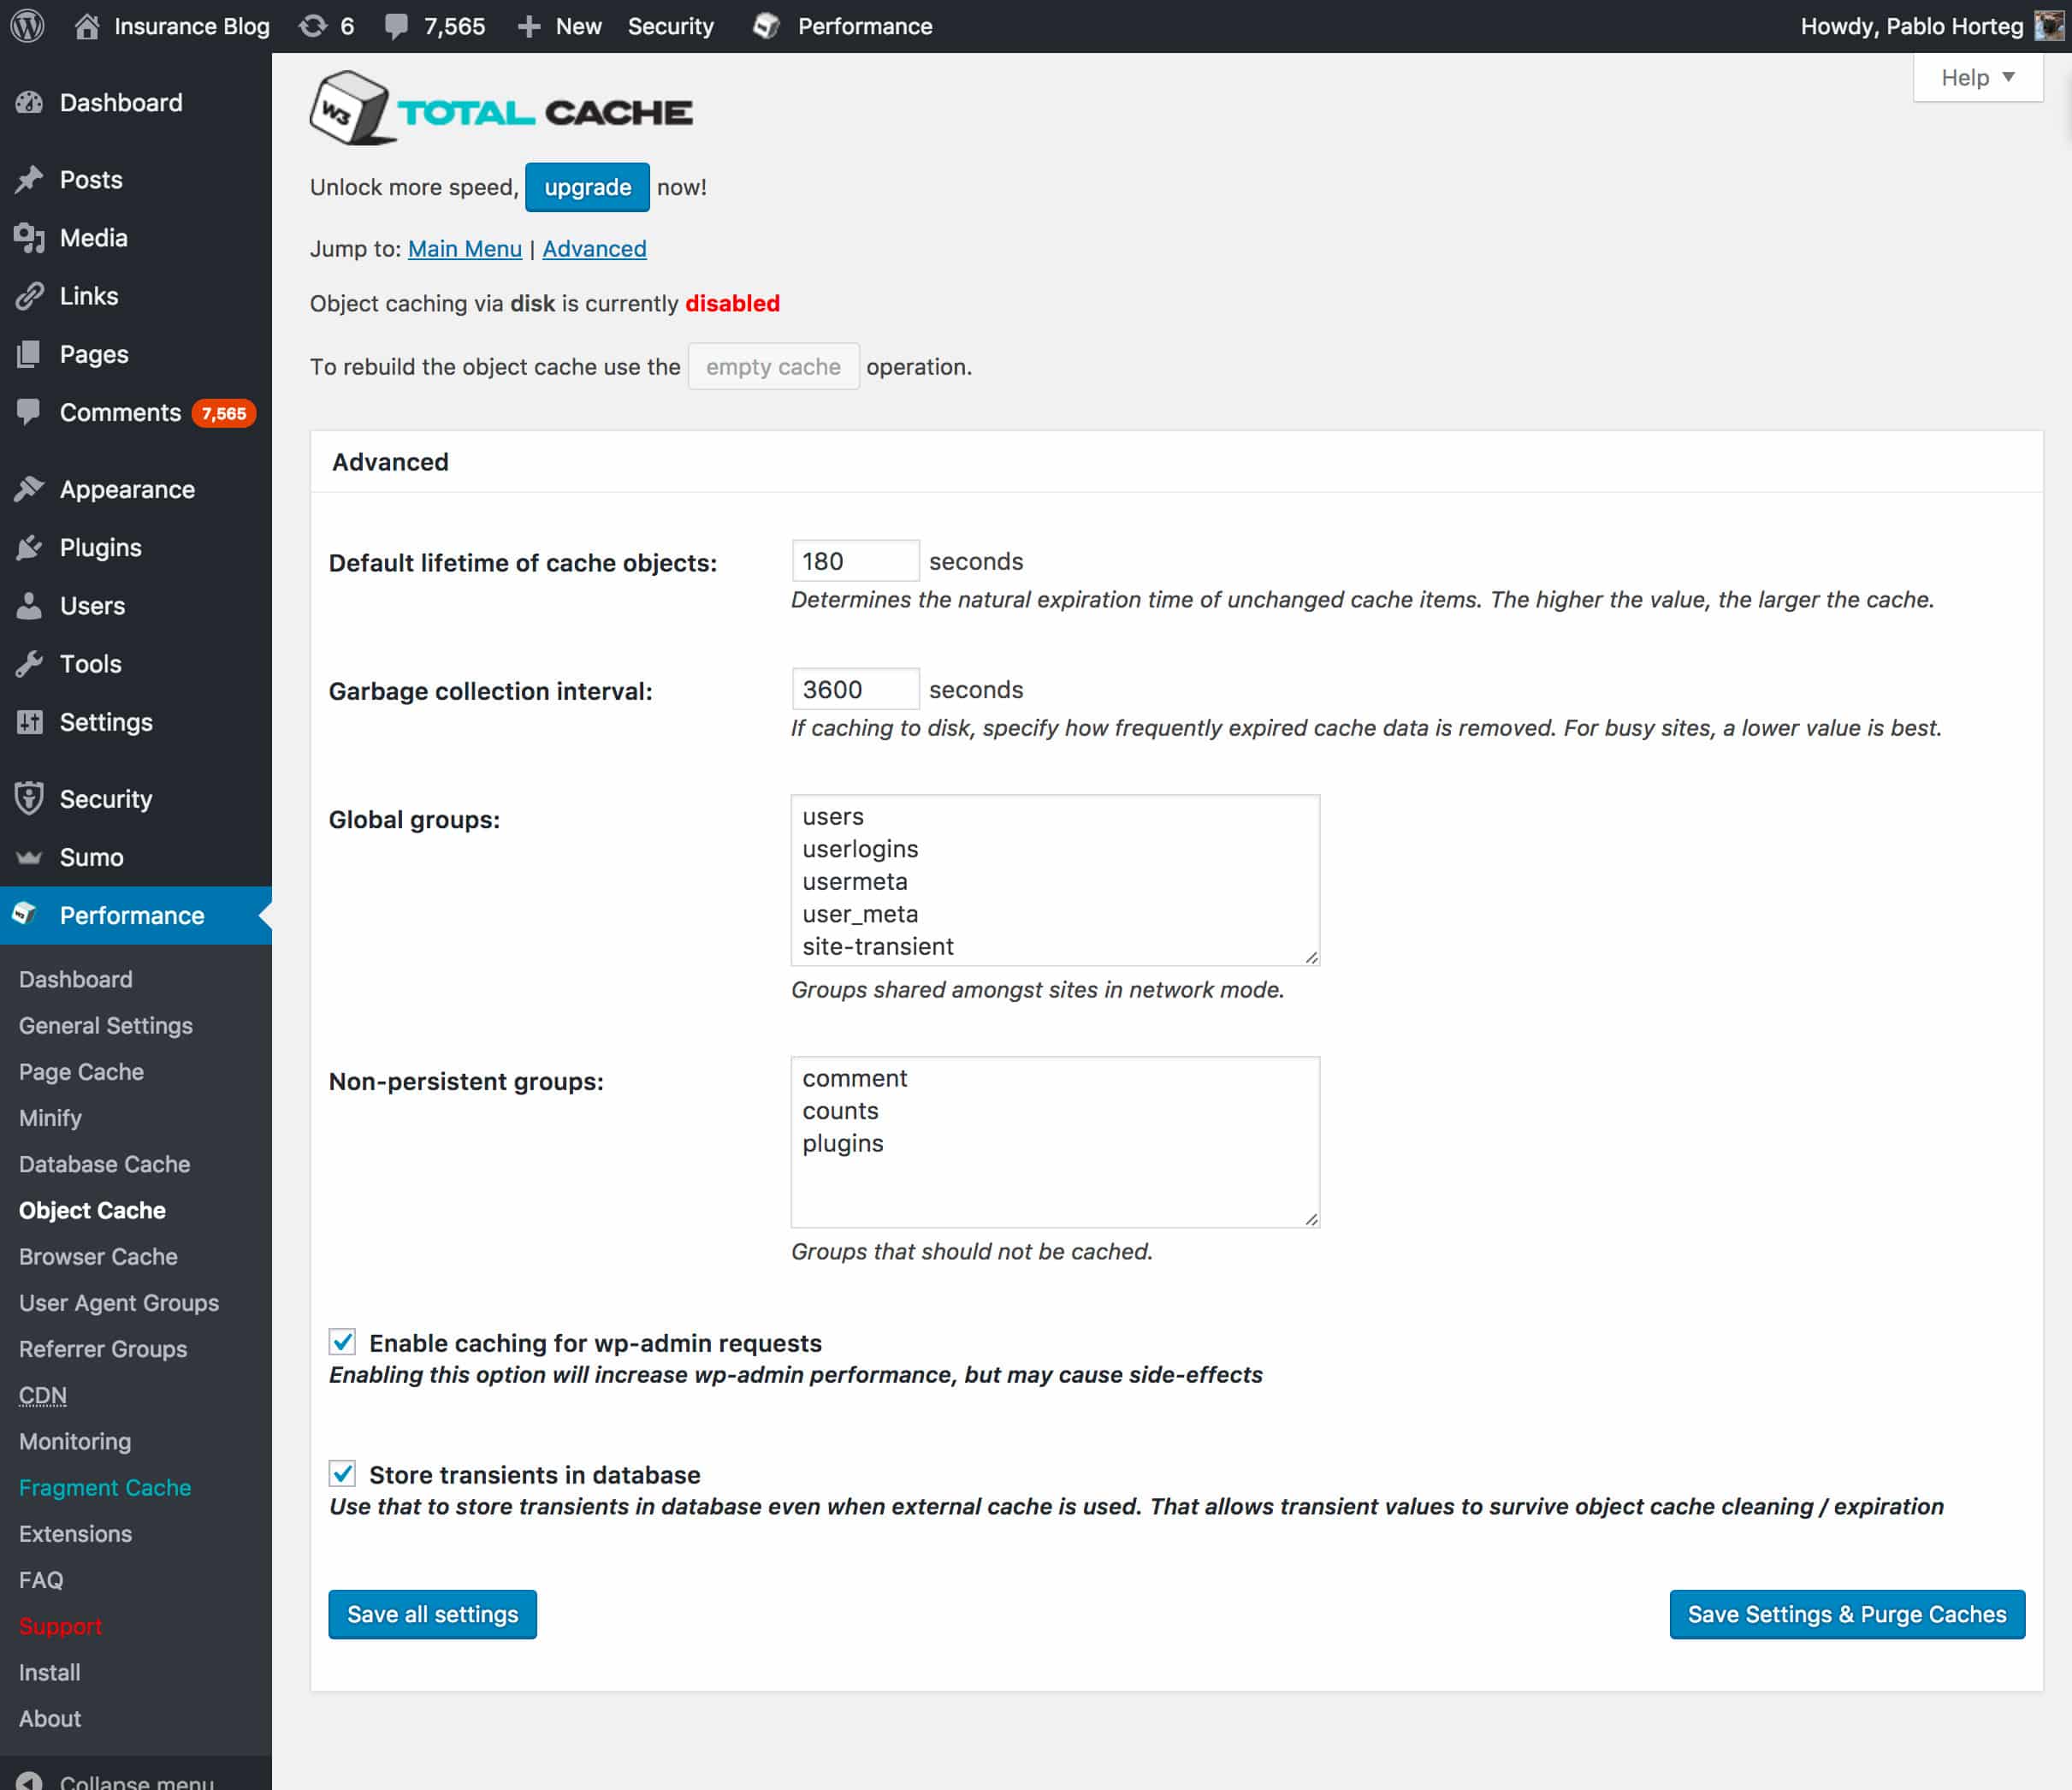
The object cache section only has a single “advanced” section. You can tell the plugin which objects should not be cached, which objects are global groups (used by all sites in networked mode), how long to cache objects and if the plugin should enable caching for administration requests. Most users won’t need to alter any of these options.
Browser Cache

You can also edit settings that apply to the user’s browser cache. This menu item has four sections, General, CSS & JS, HTML & XML, and Media & other files.
Browser Cache: General
The first four options in this section can be used to ensure the data in the user’s browser cache is still valid. You can modify these settings to ensure the client has up to date resources. The last-modified setting should always be left on because it informs the browser if a new file needs to be downloaded from your server.
Enabling the W3 Total Cache header is completely optional and can be left at default settings. Make sure you leave both Enable HTTP (gzip) compression and Prevent caching of objects after settings change ON, as they help ensure the user has up to date files. Most users won’t have to tweak any of the other settings the general section.
Browser Cache: CSS & JS, HTML & XML, Media
These sections allow you to override the rules set in the Browser Cache: General section for specific types of files. For example, you may prefer to have a different setting for browser caching of CSS files.
User Agents Groups
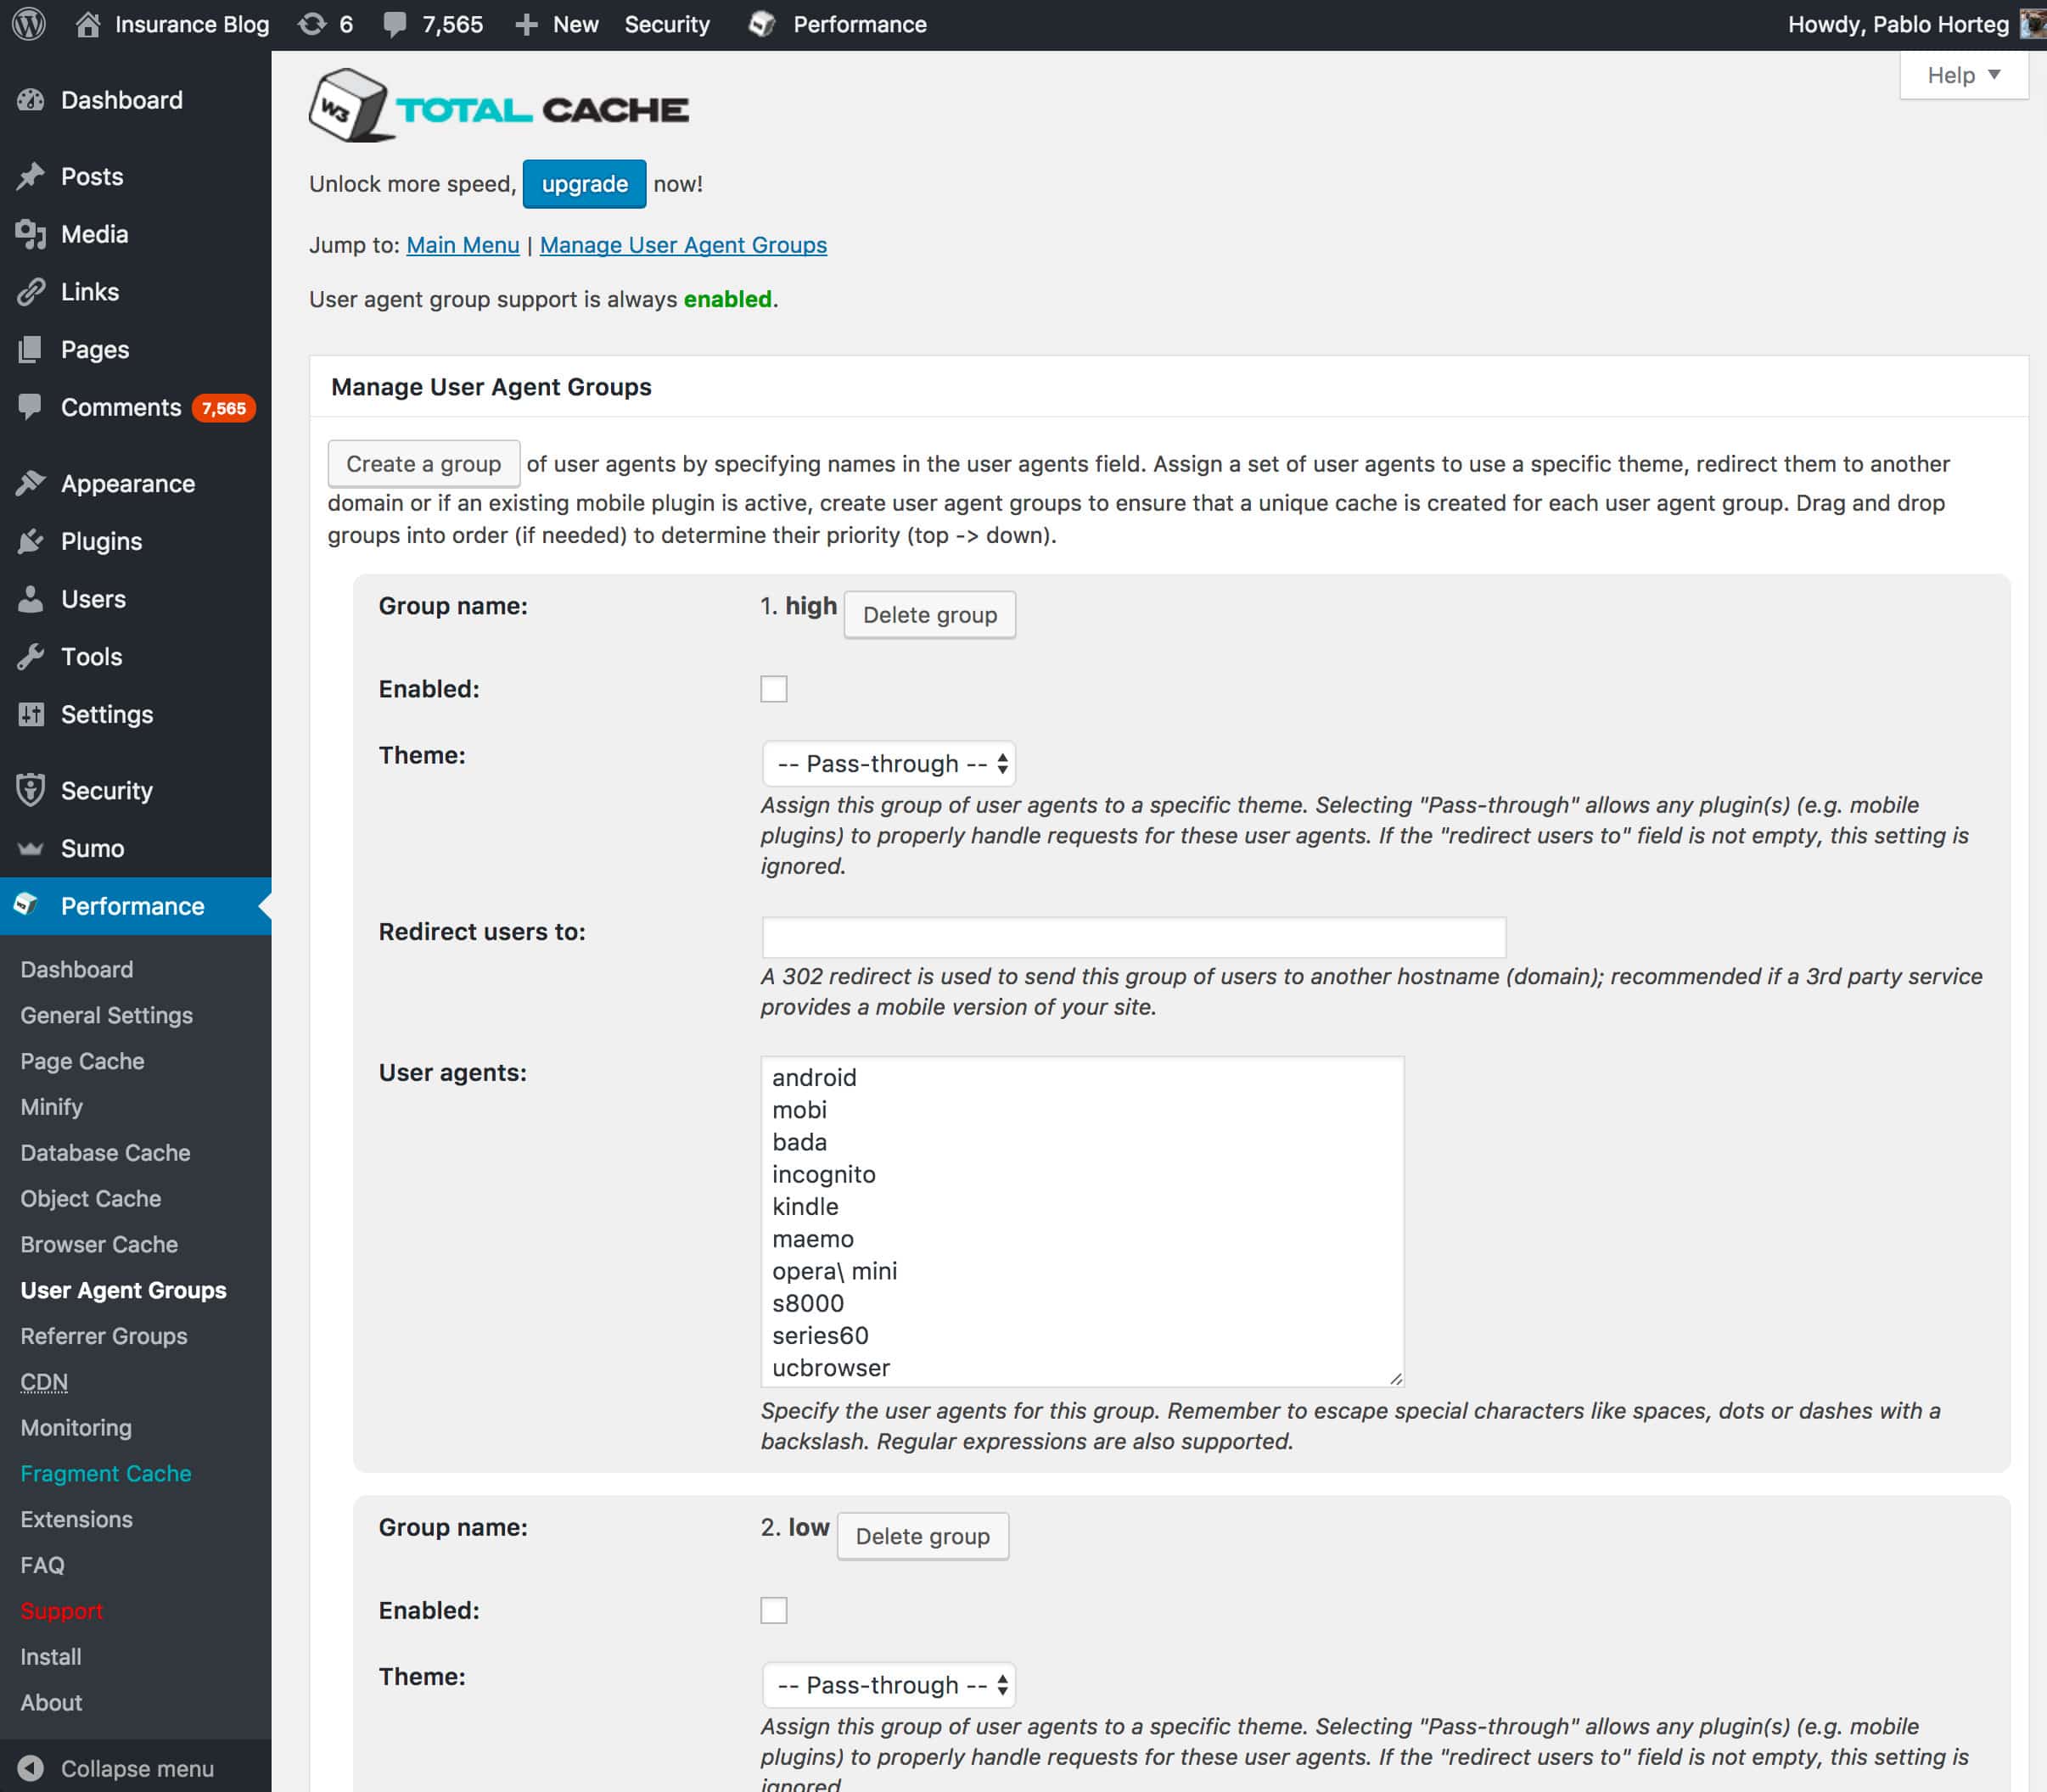
User Agent Groups: Manage user agent groups
A user agent is a string of text that identifies a piece of software or hardware. Web browsers, operating systems, mobile phones and other devices all have unique users agents. This section gives you the ability to manage groups of user agents and control what happens to each group of user agents. For example, you might prefer that requests from Android or iPhone devices be treated differently to clients who are using a Windows PC.
Referrer Groups
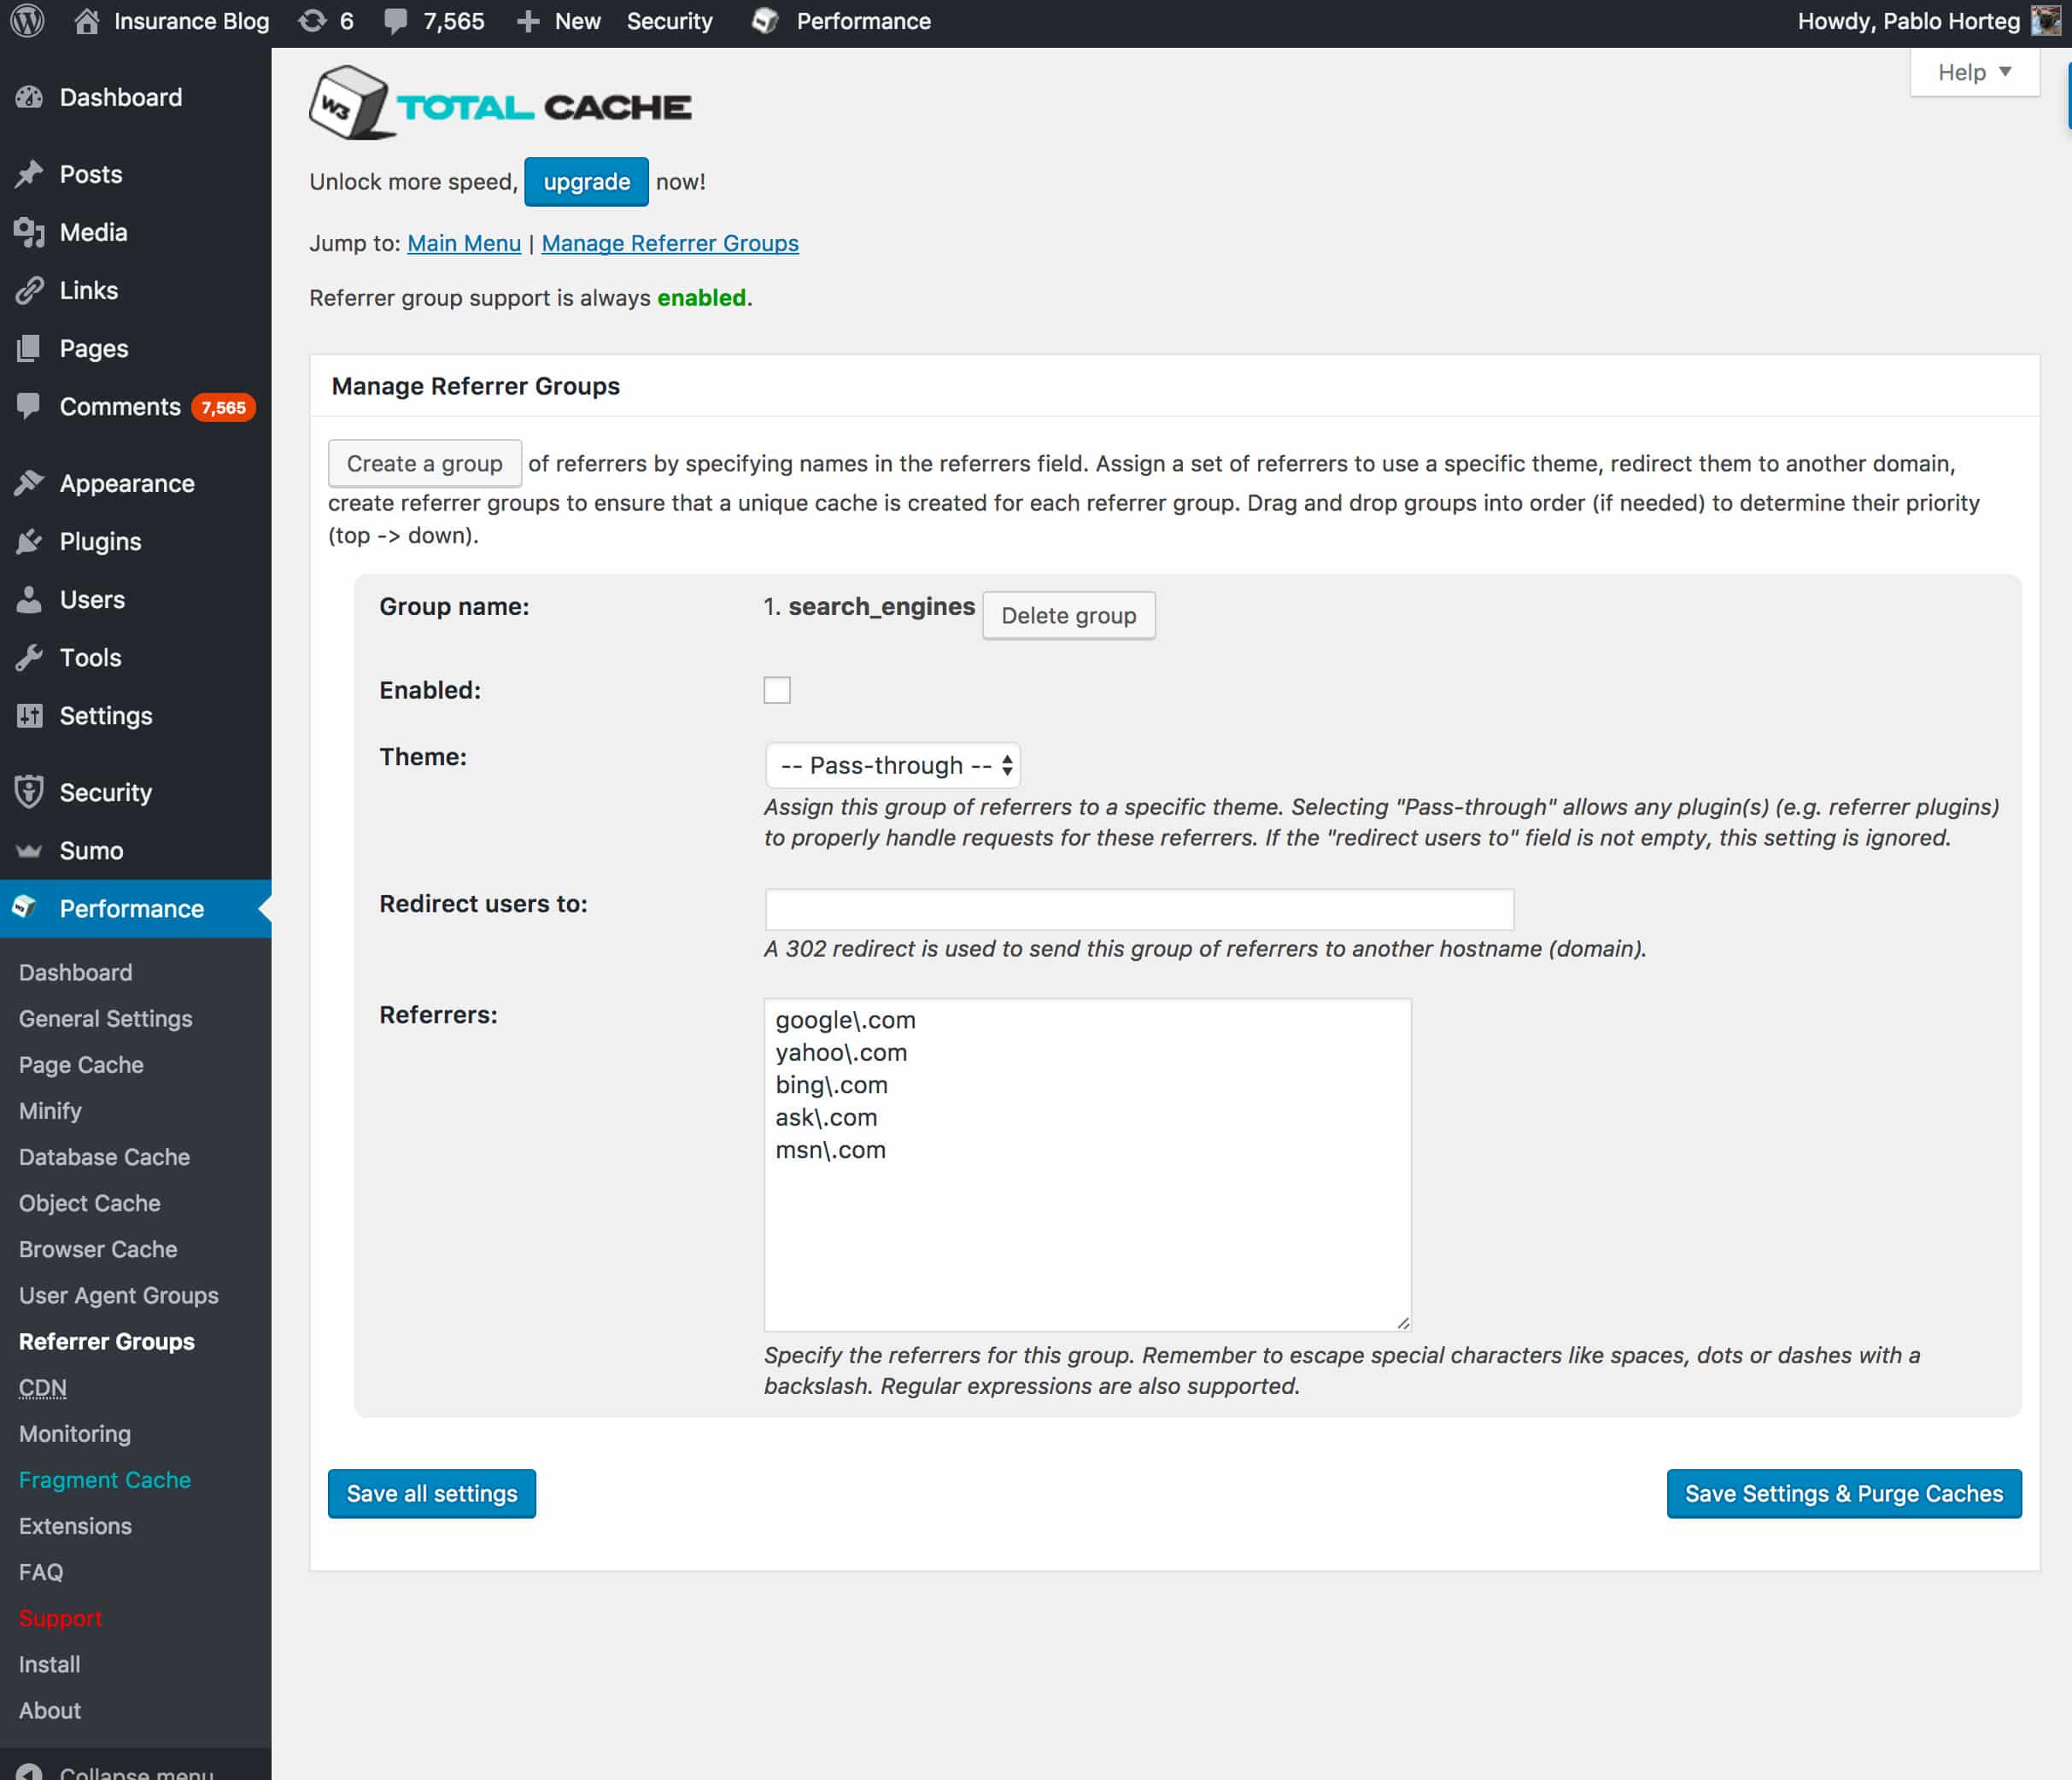
This section allows you to manage visitors who are coming from different referrers. A different cache can be created for each referrer group, so those visitors aren’t shown the incorrect cached resources. You can also send visitors from a specific referrer onto another domain or show them a different theme. This section is pre-populated with a “search engines” referrer group that has the five major search engines listed.
CDN

The CDN menu helps you manage which resources are mirrored from your server to your content delivery network. You must activate your CDN in the General Settings section before using this configuration panel.
There are several buttons to the top of the page:
- Fix attachment URLs
Will repair links with attachments if a URL has been changed and they are failing to load correctly. - Importing attachments into the Media Library
If attachments from your CDN are not correctly appearing in your media library, use this button to import them - Purge, Purge CDN completely and Update media query string
These buttons allow you to purge the content on your CDN and ensure it is sending up-to-date material.
CDN: General
In most cases, users will leave all of the options in this section checked. They specify which kinds of content the CDN should host and what additional file information should be added (canonical headers).
CDN: Advanced
This section contains advanced settings for your CDN. In most cases, you will not have to modify these settings.
- Disable CDN on SSL pages
If you have warnings on your SSL pages about non-SSL resources being used, you may have to disable your CDN on SSL pages. - Disable CDN for following roles
You can disable the CDN for specific users roles in this section. - Wp-includes file types to upload
You can specify which types of WordPress files should be uploaded to your CDN here. - Theme file types to upload
Similarly, you can specify which types of theme files should be uploaded to your CDN. - File types to import
W3TC can automatically import files from third party sources and upload them to your CDN, potentially giving your site a speed boost. - Custom files list
You can specify additional files to upload to the CDN here. It accepts wildcards, so you can specify entire groups of files in specific folders. - Rejected user agents
User agents that cannot access resources on the CDN - Rejected files
Files that will never be stored in the CDN
Monitoring
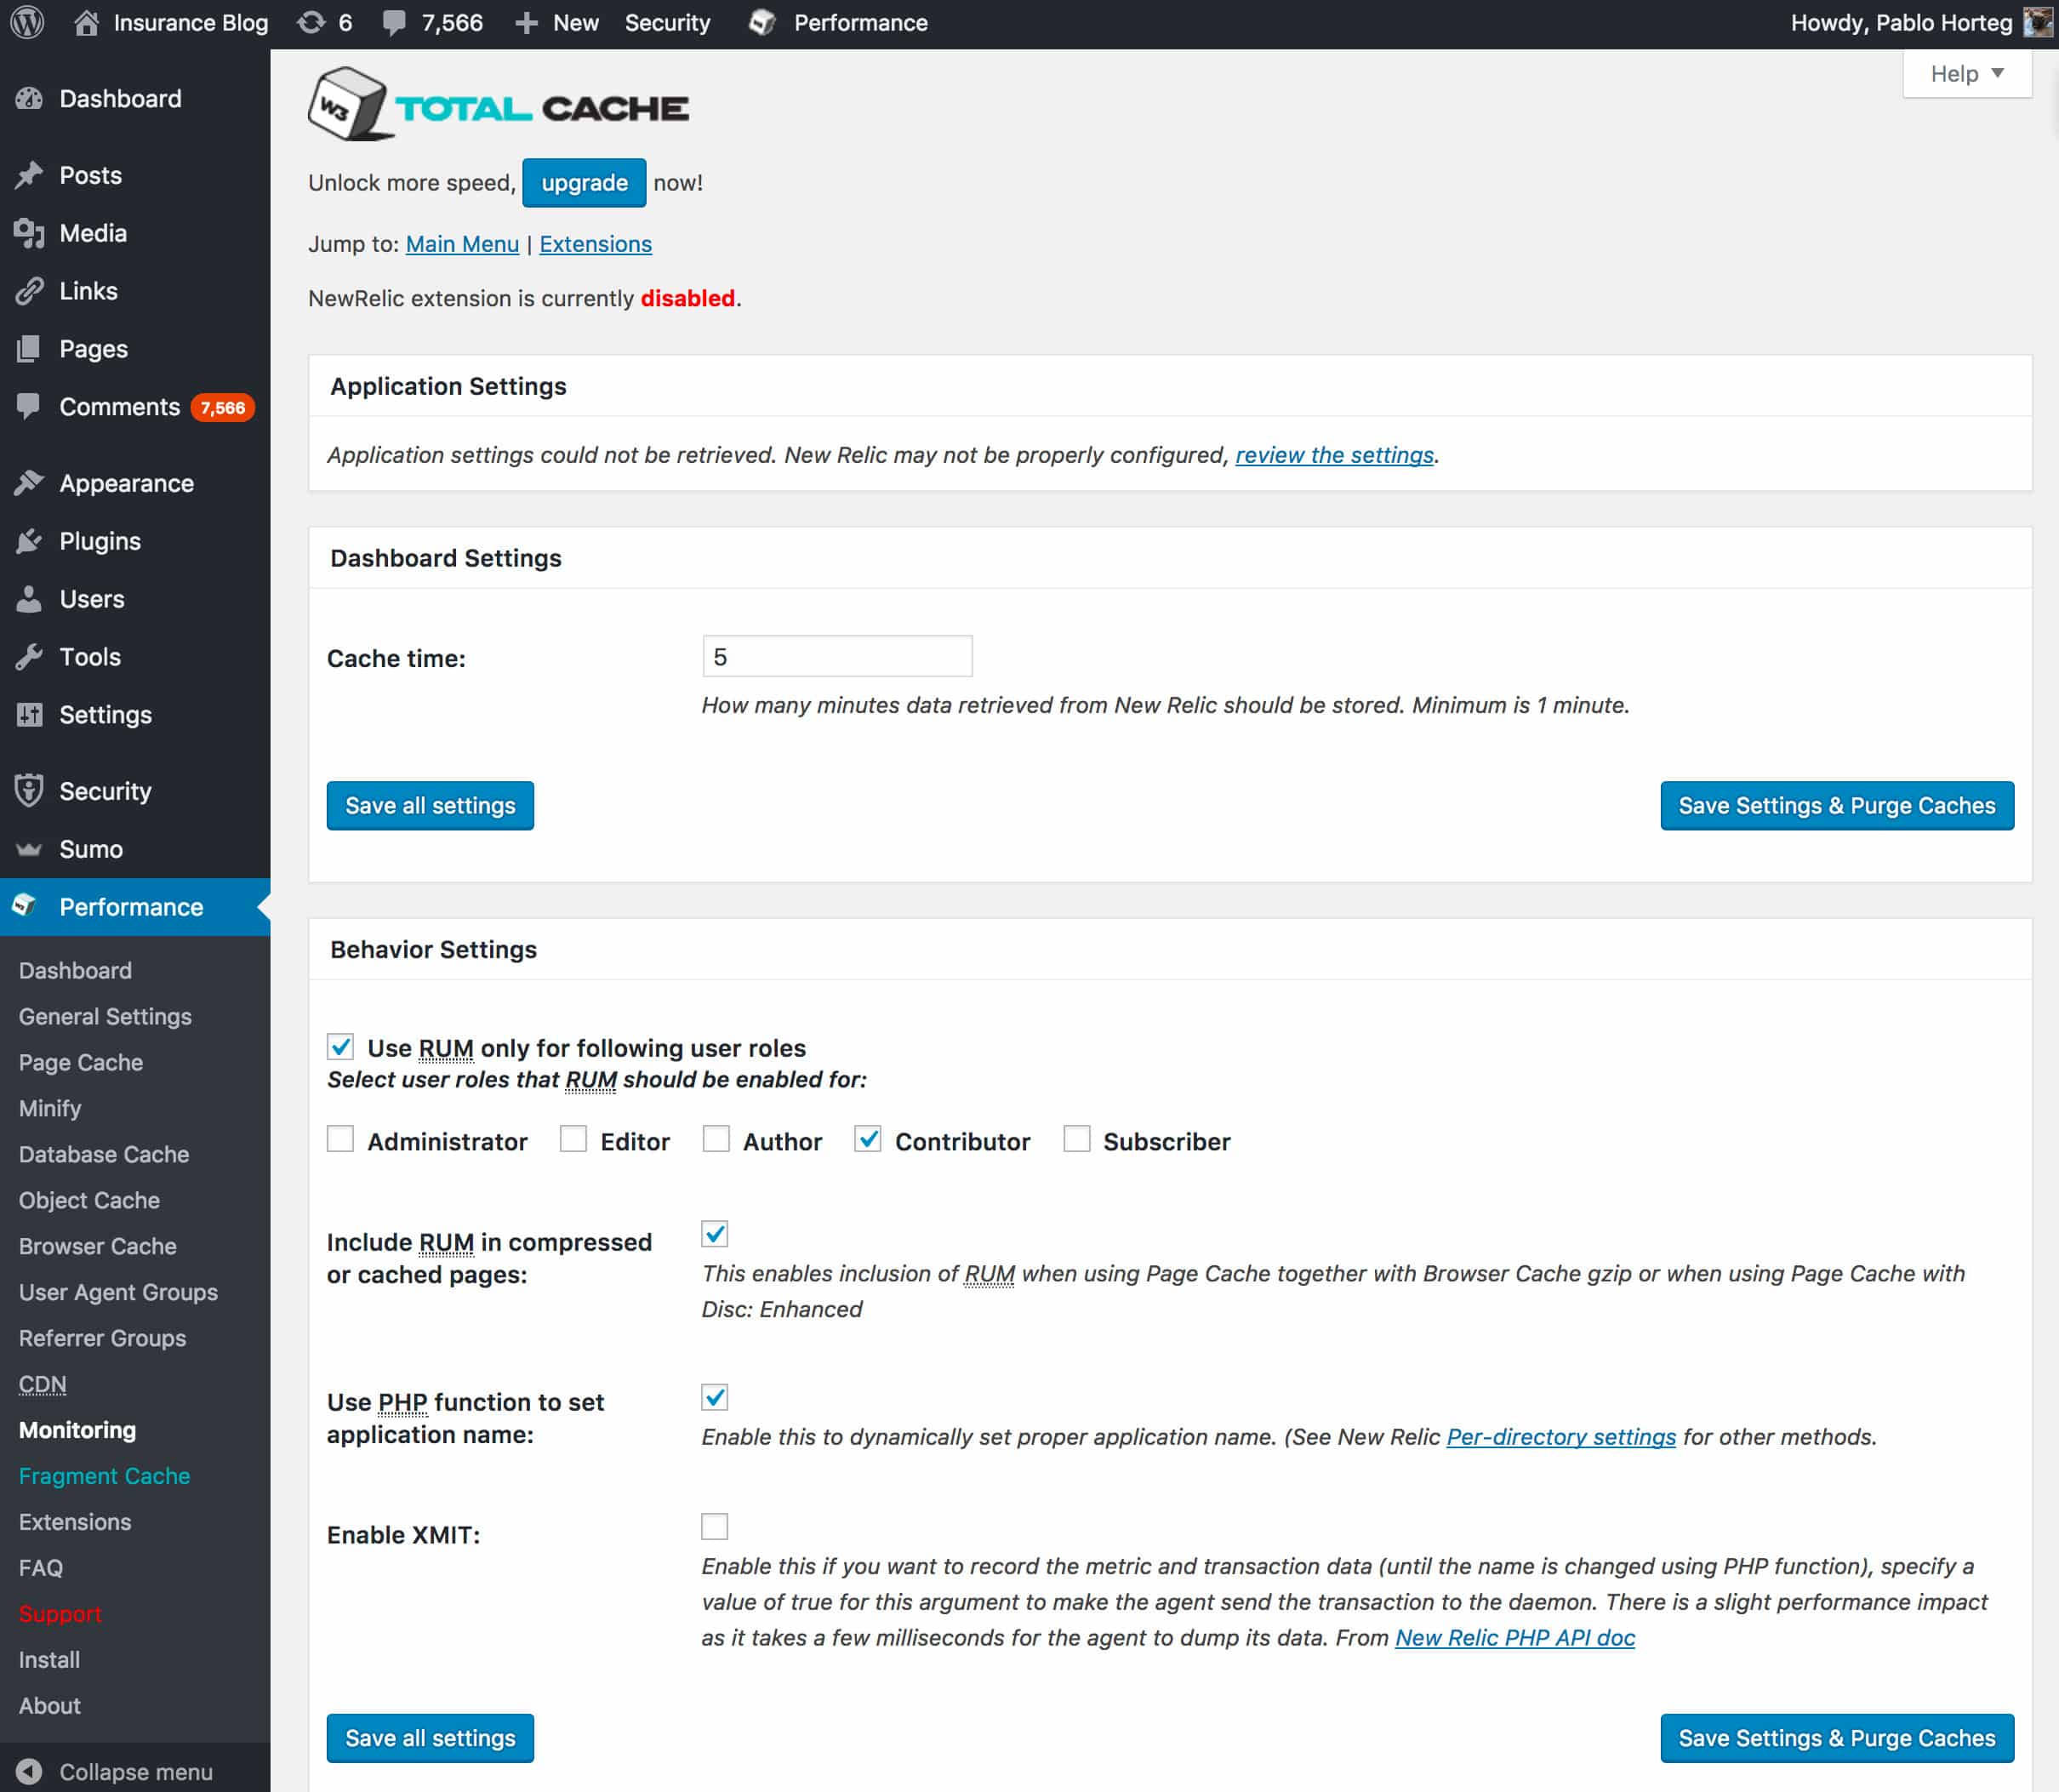
The monitoring section covers any options associated with the NewRelic monitoring service. You must sign up for NewRelic and enable it in the General Settings section before these settings have an effect.
Monitoring: Dashboard Settings
This section allows you to define how often monitoring data should be retrieved on NewRelic. This data is displayed on the W3TC’s Dashboard page.
Monitoring: Behaviour settings
This section allows contains options for NewRelic Realtime User Monitoring (RUM) software. It is a useful tool for determining how well users are using your website.
Fragment Cache
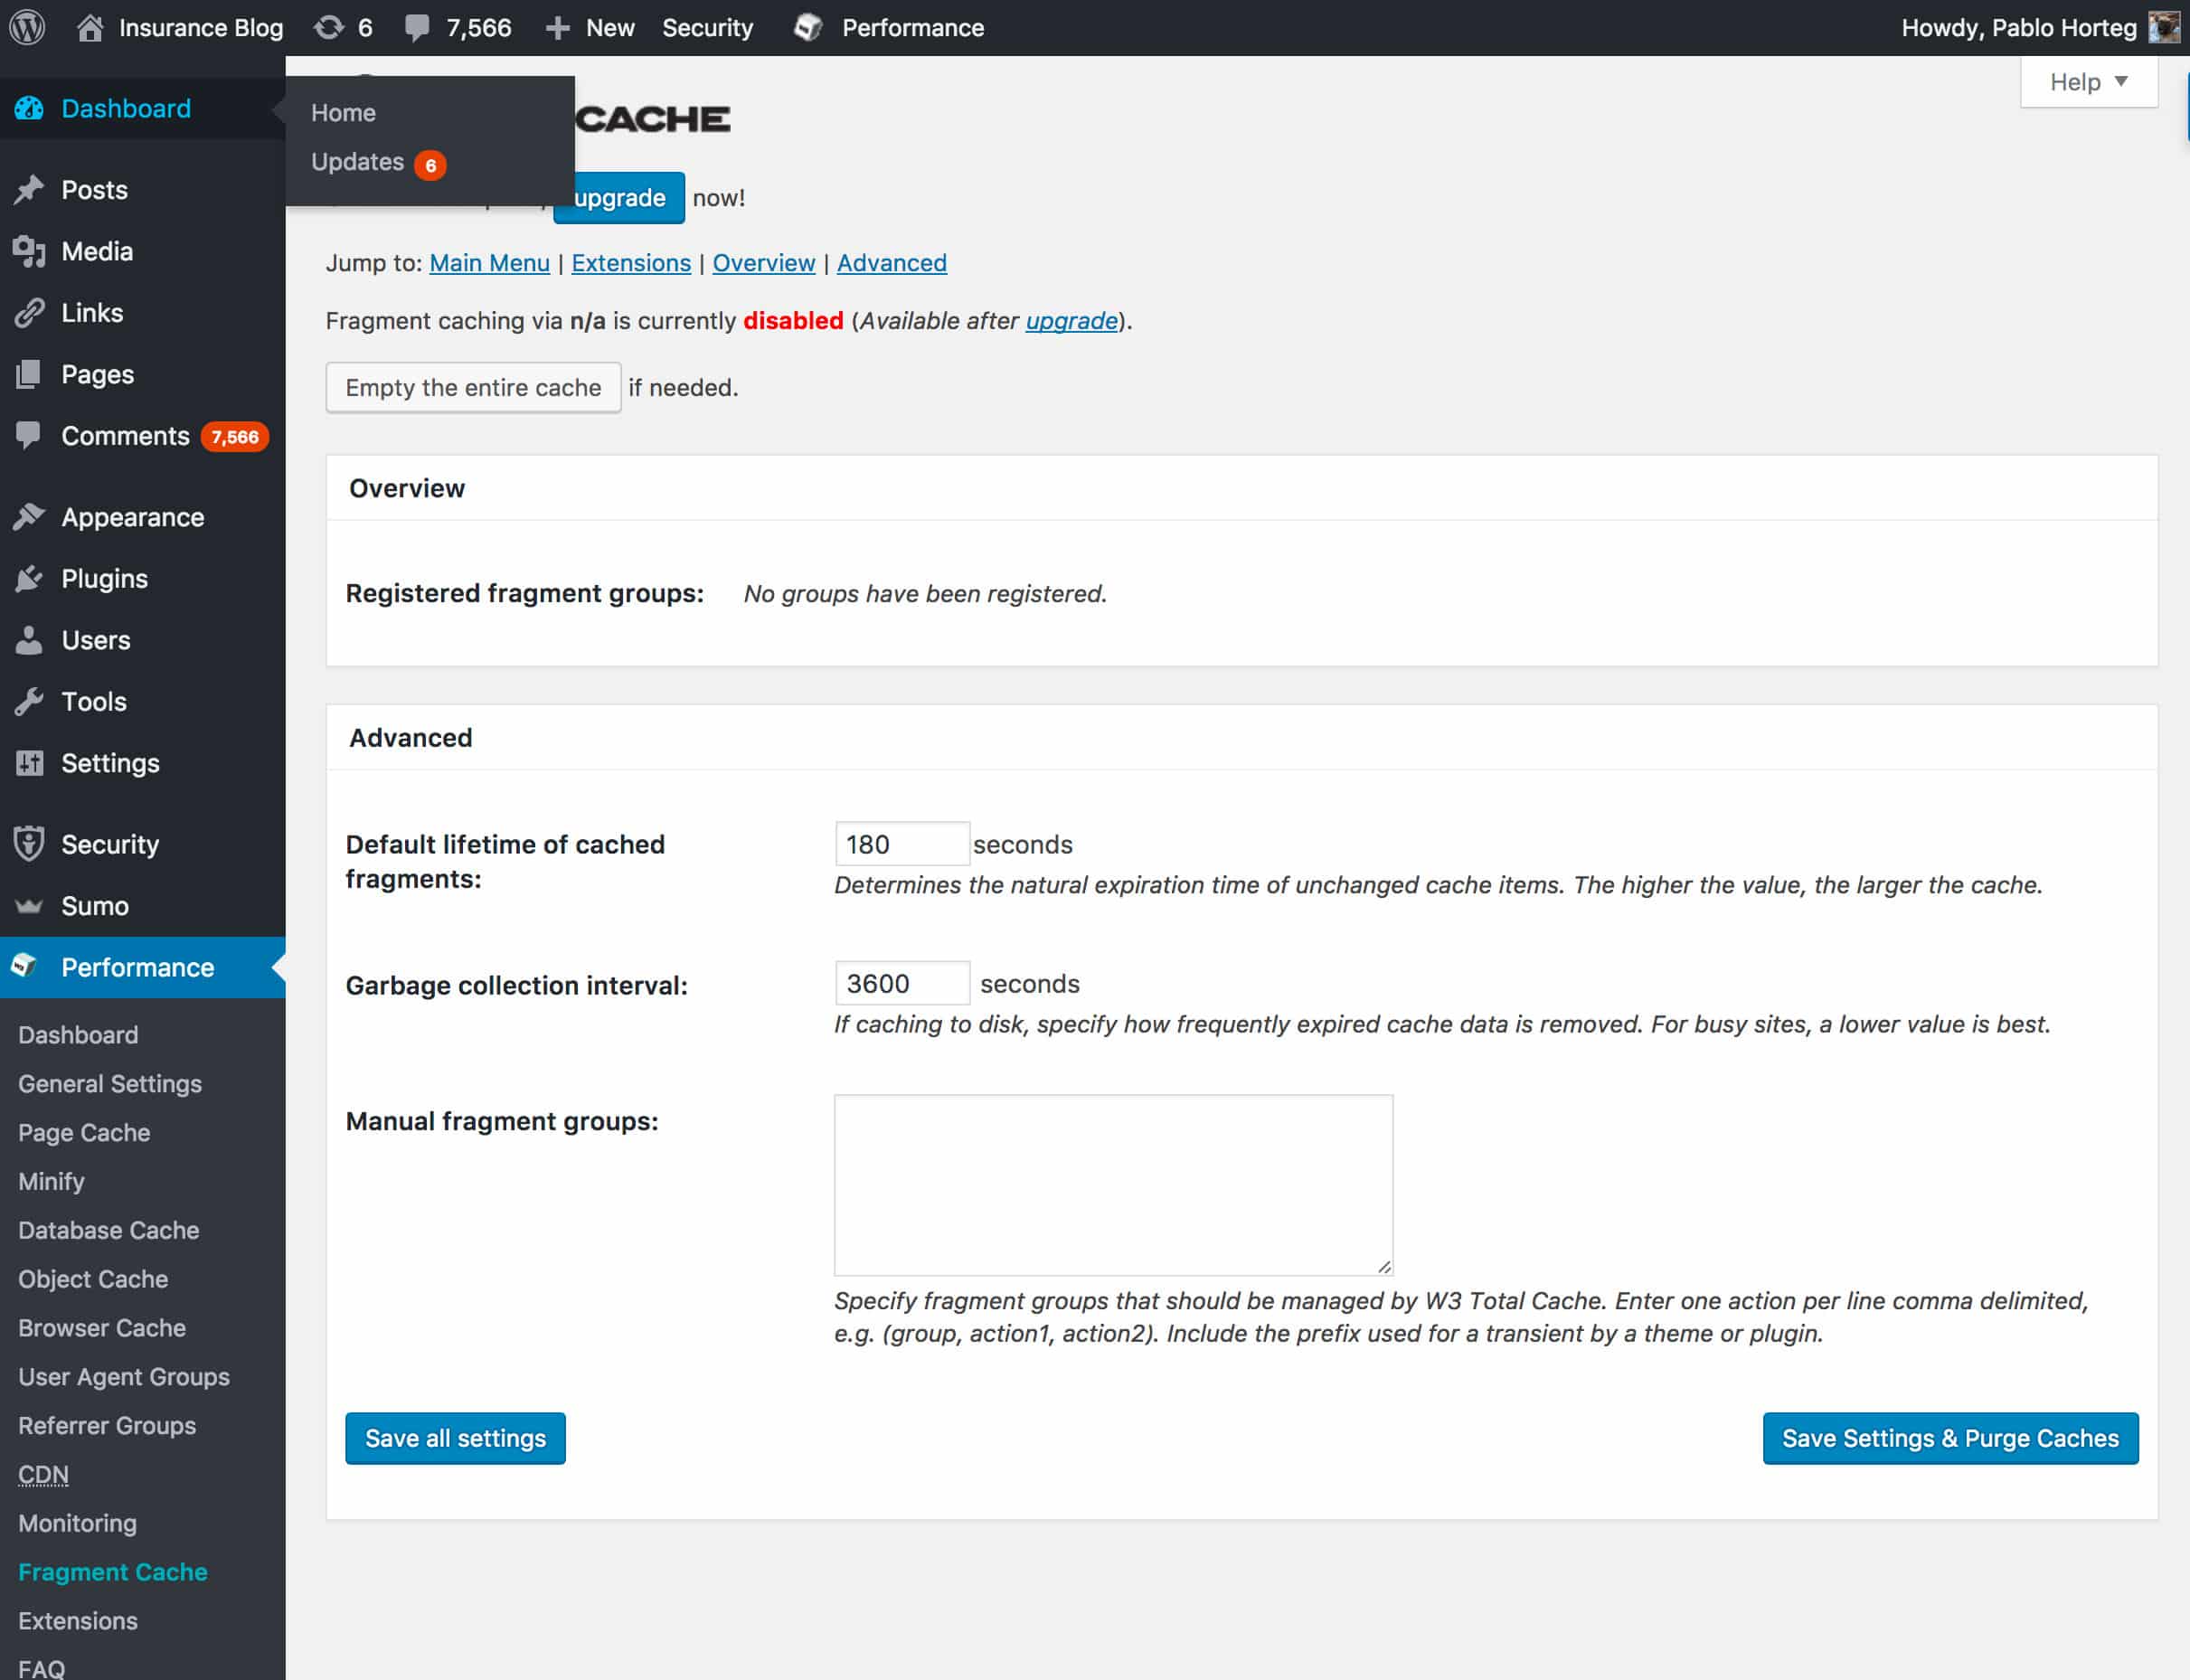
If you have enabled a fragment cache, use this section to tweak its options.
Fragment Cache: Overview
Allows you to view the registered fragment groups.
Fragment Cache: Advanced
This section allows you to specify how long cached fragments should be used and how frequently to discard garbage data.
Extensions
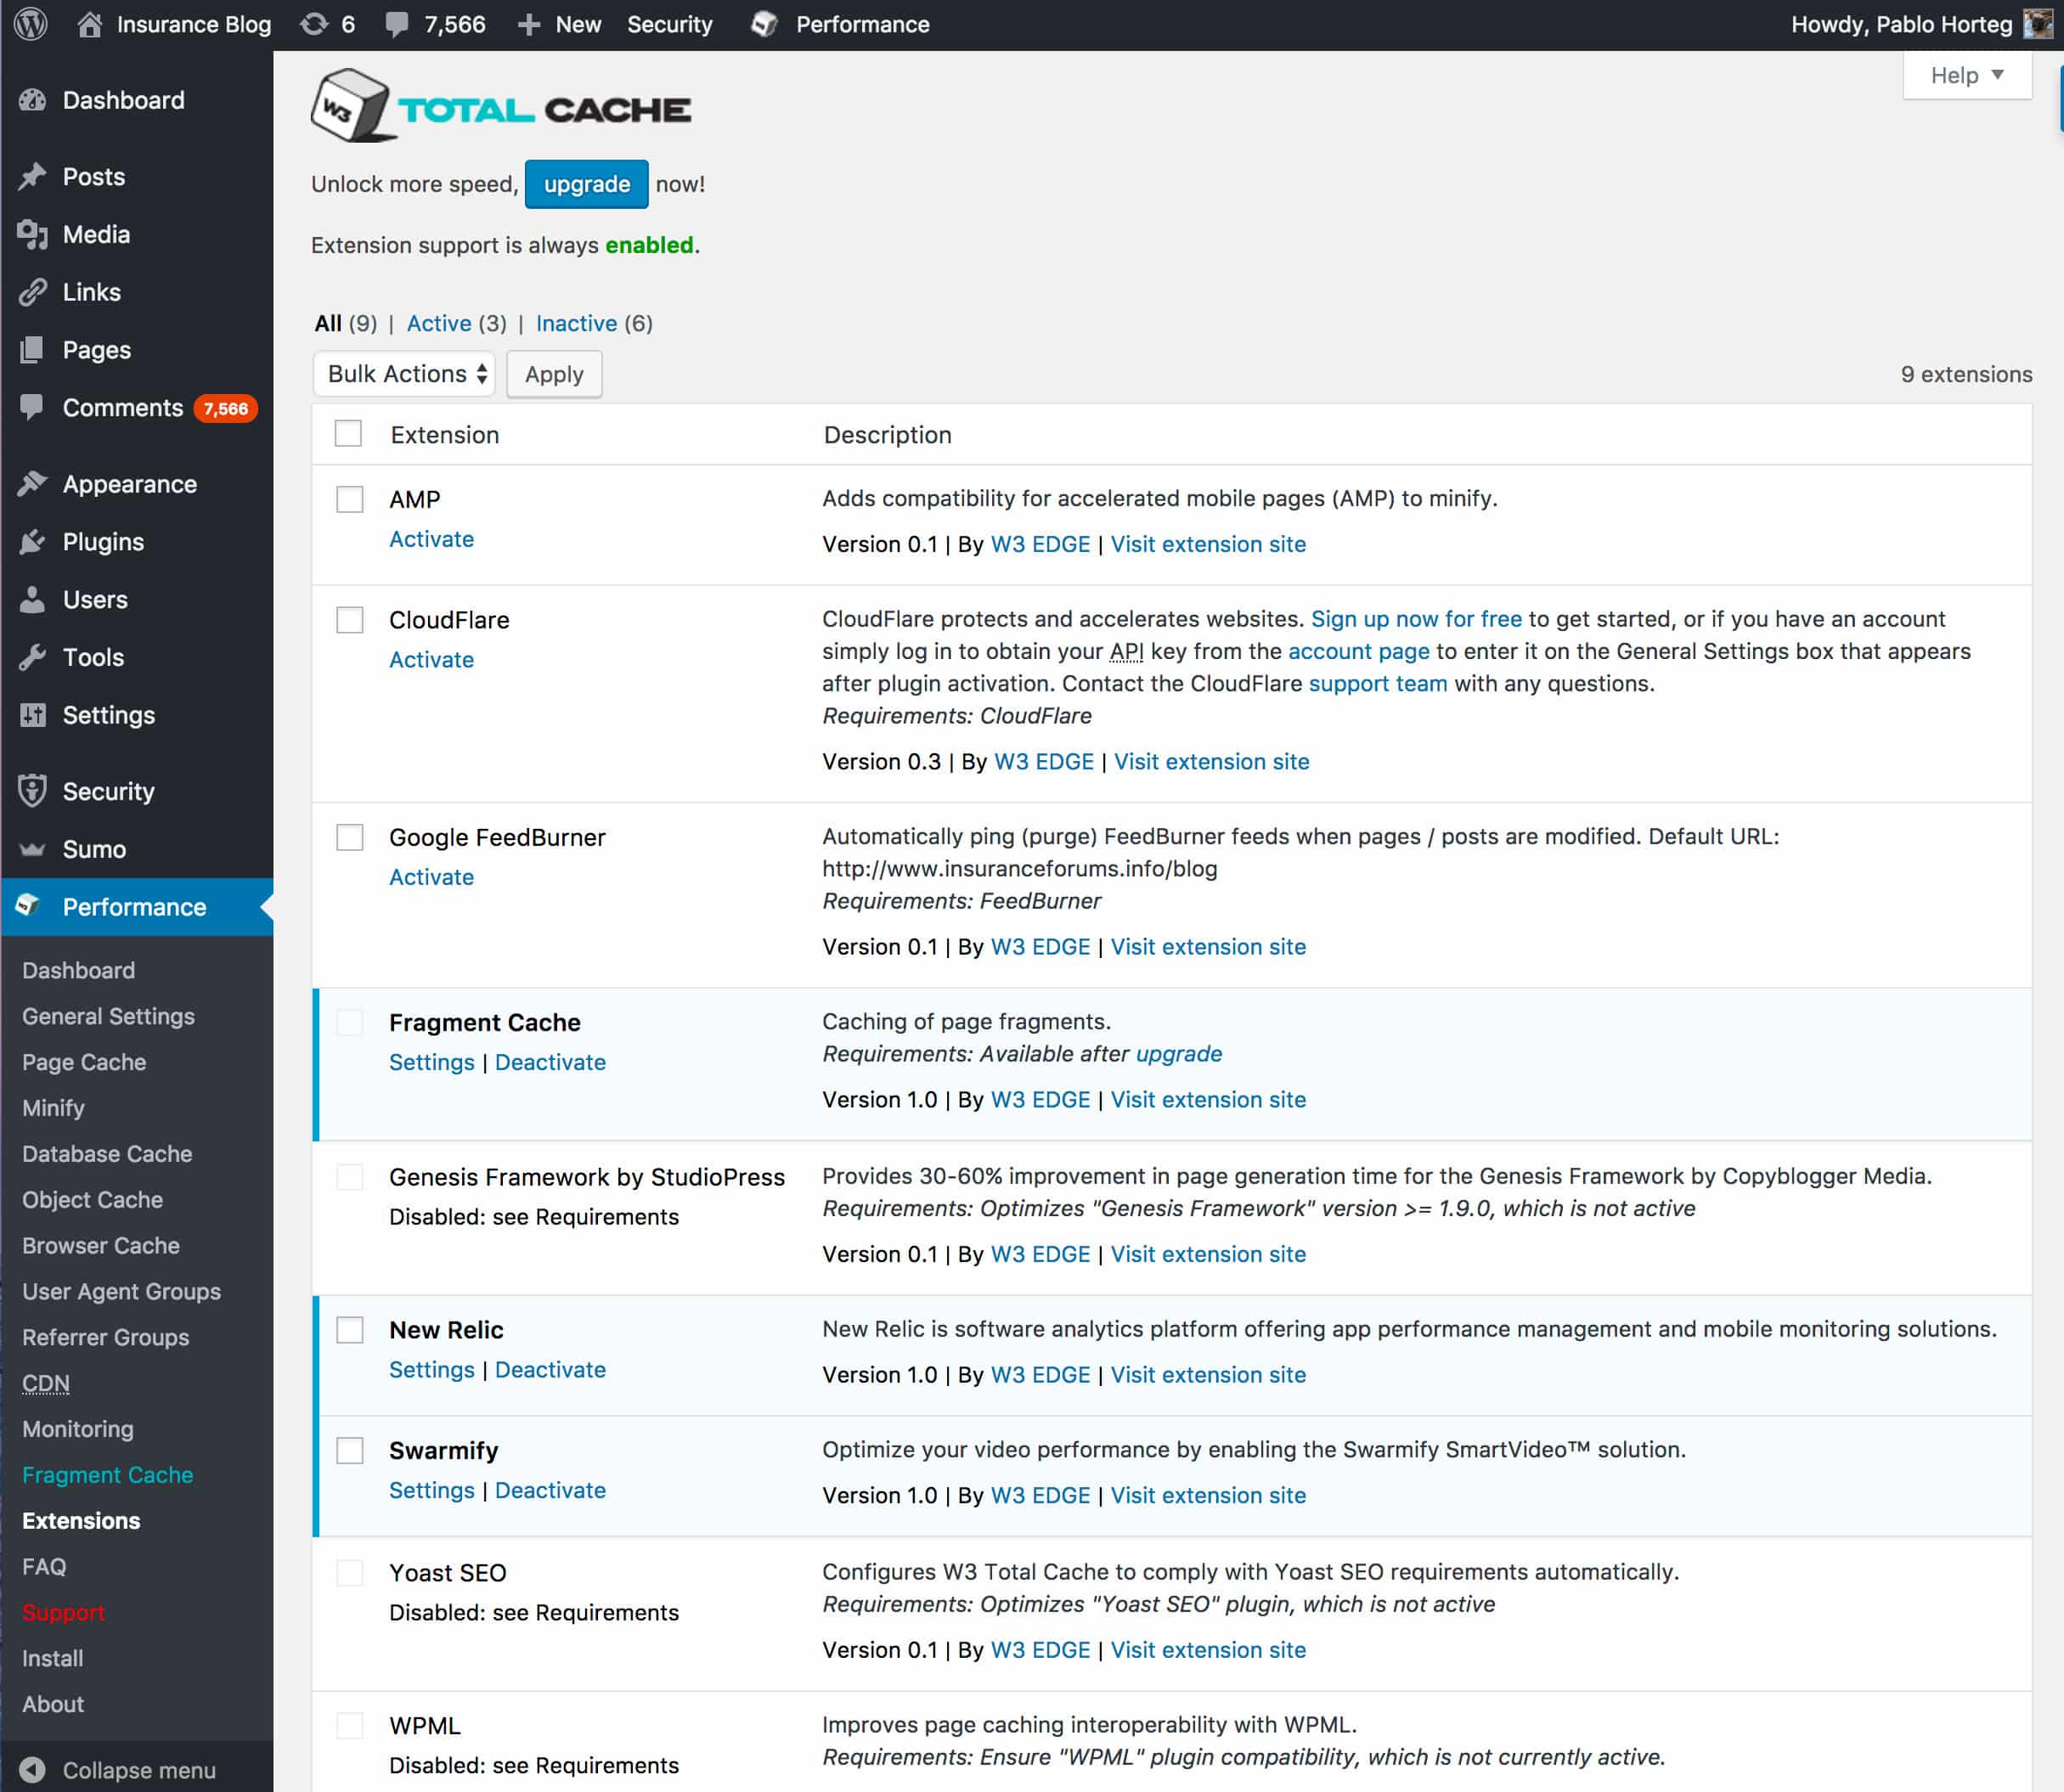
This section allows you to quickly add and remove extensions associated with W3TC. Here are many powerful add-ons available, which improve the responsiveness and flexibility of your website.
FAQ

The FAQ answers many common configuration and setup questions for the plugin. It’s a bit of a mess, but there is some very valuable information here!
Support
The support section is used to submit a support request. Users who have the free version of the plugin can only submit bug reports and feature suggestions. Users with the Premium version have additional options for requesting support (as listed on the Dashboard).
Install
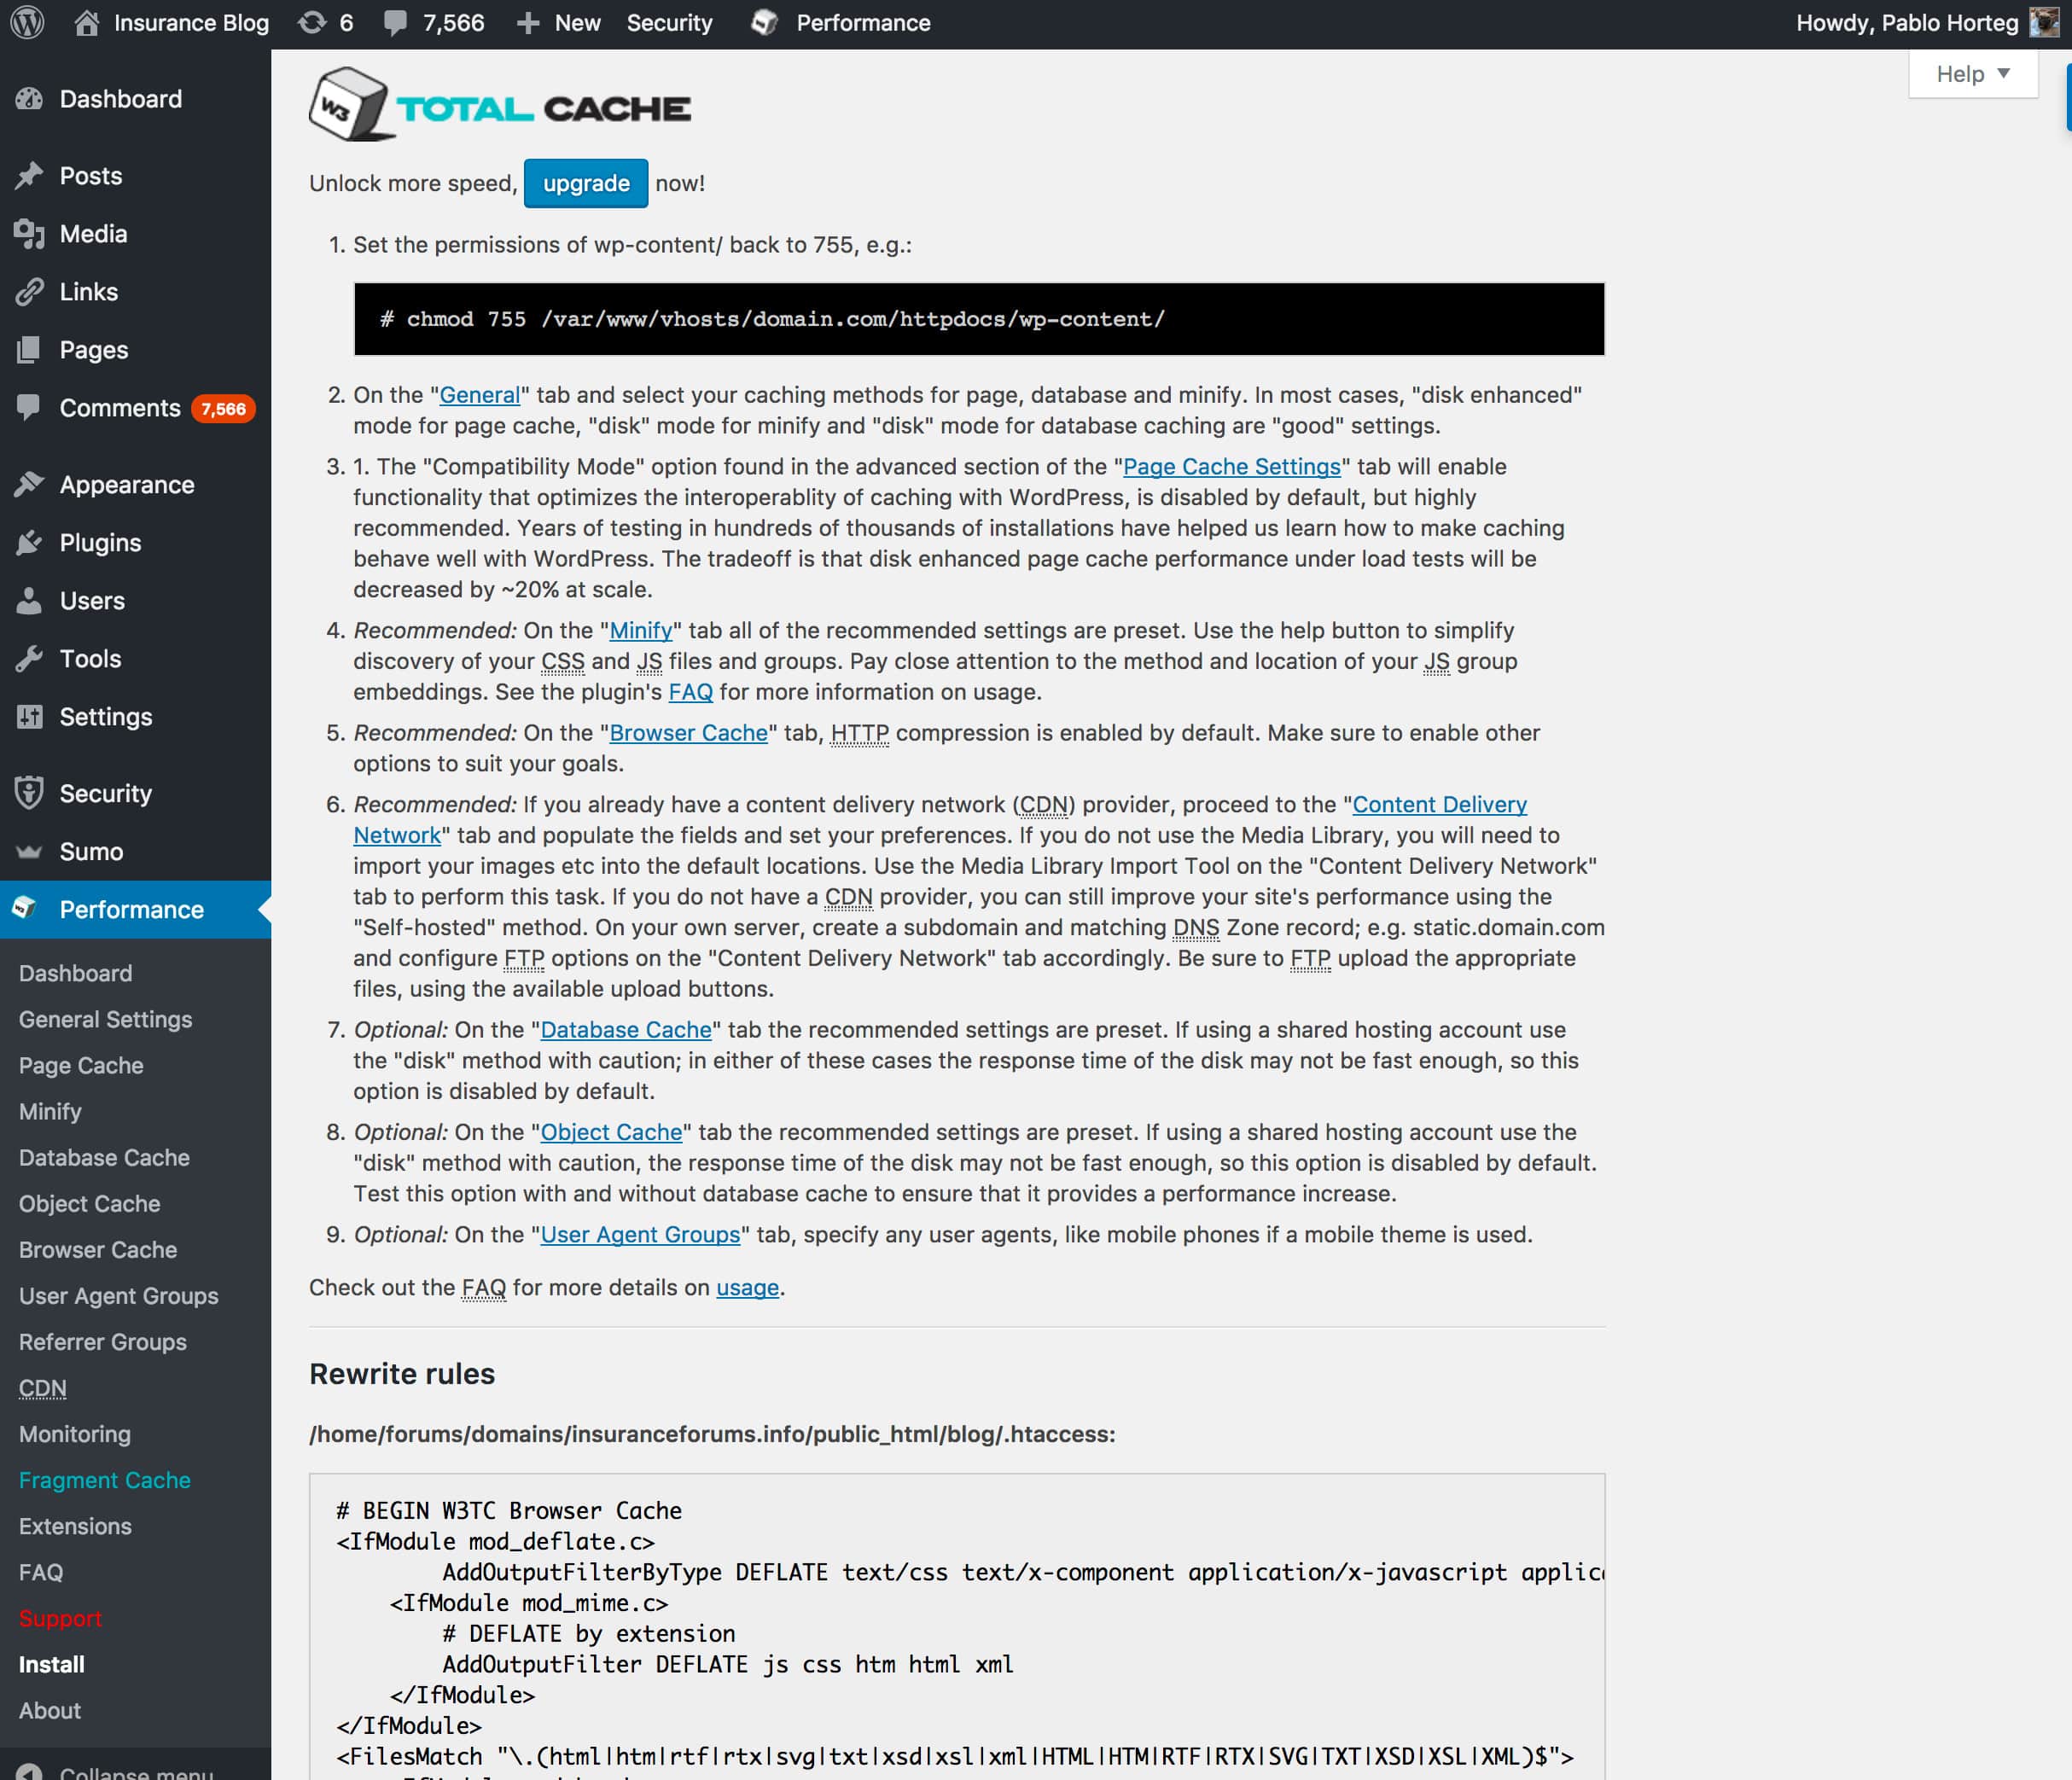
The Install section gives you further information on how to install W3TC and add new software components to your server. It provides instruction on installing Memcached, Alternative PHP Cache, XCache, eAccelerator and New Relic.
About
This page shares some information about the power of W3TC and the geniuses who created it!
We hope you enjoyed reading our complete step-by-step guide to W3 Total Cache! It is a fantastic addition to any WordPress site and can substantially improve the performance of your installation.
 234 customers signed up in the last 30 days